
21 Classic Baking Recipes for Beginners
Baking has always been one of my favorite ways to unwind, and over the years, I’ve learned that there’s nothing quite like the smell of something fresh out of the oven. For those just starting to explore the world of baking, I can totally relate to that mix of excitement and nervousness. It’s easy to feel overwhelmed by all the different techniques, tools, and ingredients, but with the right recipes and guidance, anyone can master the basics. That’s why I’ve put together a collection of 21 classic baking recipes for beginners – so you can get started with confidence and enjoy some delicious results!
Whether you’re baking cookies for the first time or trying your hand at a simple loaf of banana bread, these recipes have you covered. Each one is designed to be approachable and straightforward, with easy-to-follow steps that will guide you through the process. No fancy equipment or difficult techniques are required here – just a little bit of time, patience, and a love for baking. I’ve chosen these recipes because they’re not only simple, but also fun to make. Plus, they result in treats that will impress family and friends.
I remember the first time I baked a cake from scratch – I was nervous, but the satisfaction of pulling it out of the oven was totally worth it. Baking doesn’t have to be intimidating, and you don’t have to be a pro to create something incredible. These 21 recipes are a perfect starting point for anyone eager to dive into the world of baking.
1. Classic Chocolate Chip Cookies

Chocolate chip cookies have always been one of my absolute favorites to bake. There’s something about that warm, gooey center and the crispy edges that just feels like a hug in cookie form. If you’re new to baking, this classic chocolate chip cookie recipe is the perfect place to start. It’s simple, delicious, and a great way to get comfortable with mixing, measuring, and baking. Plus, you can’t go wrong with the irresistible smell of fresh cookies filling your kitchen!
GET THE RECIPE2. Greek Yogurt Banana Bread

Banana bread has always been one of those comforting, go-to recipes that I love making whenever I have overripe bananas sitting around. It’s quick, easy, and perfect for a cozy treat at any time of day. If you’re just starting out with baking, this simple banana bread recipe is a great one to try. With just a few basic ingredients, you’ll have a delicious, moist loaf that’s sure to impress, and it’s nearly impossible to mess up! Plus, it’s a wonderful way to use up those extra bananas that always seem to ripen too fast.
GET THE RECIPE3. Vanilla Cupcakes

There’s something so special about a light and fluffy vanilla cupcake – simple, but absolutely delicious. Whenever I’m in the mood to bake something sweet and easy, these basic vanilla cupcakes are always my go-to. They’re perfect for beginners because the recipe is straightforward and the ingredients are all things you likely already have in your kitchen. Plus, these cupcakes have a light, airy texture that’s just irresistible. Whether you’re making them for a special occasion or just because, they’re sure to be a hit!
GET THE RECIPE4. Easy Apple Pie

Apple pie has always been a favorite of mine, especially when it’s made from scratch with sweet, tart apples and a flaky, buttery crust. If you’re new to baking, this easy apple pie recipe is the perfect introduction to the classic dessert. It takes a little time, but the steps are simple, and the end result is so rewarding. The smell of apples and cinnamon baking in the oven is enough to make anyone’s mouth water! Plus, there’s nothing quite like serving up a homemade pie to family and friends – it’s guaranteed to impress.
Servings: 8 slices
Ingredients:
- 2 pie crusts (store-bought or homemade)
- 6 cups sliced and peeled apples (such as Granny Smith or Honeycrisp)
- 3/4 cup granulated sugar
- 1 teaspoon ground cinnamon
- 1/4 teaspoon nutmeg
- 2 tablespoons all-purpose flour
- 1 tablespoon lemon juice
- 1 tablespoon butter, cut into small pieces
- 1 egg (for egg wash)
Instructions:
- Preheat your oven to 425°F (220°C).
- In a large bowl, combine the sliced apples, sugar, cinnamon, nutmeg, flour, and lemon juice. Toss to coat the apples evenly.
- Roll out one pie crust and place it in a 9-inch pie pan. Fill with the apple mixture and dot with butter.
- Roll out the second pie crust and place it over the filling. Seal and flute the edges, then cut slits in the top crust to allow steam to escape.
- Brush the top crust with beaten egg for a golden finish.
- Bake for 15 minutes in the preheated oven, then reduce the temperature to 350°F (175°C) and bake for an additional 30-35 minutes, or until the apples are tender and the crust is golden brown.
- Let cool before serving.
5. Basic Brownies

Brownies have always been popular in my house, and there’s just something about their rich, fudgy texture that makes them irresistible. If you’re just starting to bake, this basic brownie recipe is a great place to begin. It’s super straightforward, with ingredients you probably already have on hand, and the result is a batch of brownies that are dense, chocolatey, and perfect for any occasion. Whether you’re a beginner or an experienced baker, these brownies are sure to become a favorite in your baking rotation!
Servings: 16 brownies
Ingredients:
- 1/2 cup (1 stick) unsalted butter
- 1 cup granulated sugar
- 2 large eggs
- 1 teaspoon vanilla extract
- 1/3 cup unsweetened cocoa powder
- 1/2 cup all-purpose flour
- 1/4 teaspoon salt
- 1/4 teaspoon baking powder
Instructions:
- Preheat your oven to 350°F (175°C) and grease an 8×8-inch baking pan.
- In a medium saucepan, melt the butter over low heat. Remove from heat and stir in the sugar, eggs, and vanilla.
- Beat in the cocoa powder, flour, salt, and baking powder until just combined.
- Pour the batter into the prepared baking pan and spread evenly.
- Bake for 20-25 minutes, or until a toothpick inserted into the center comes out with a few moist crumbs.
- Let cool in the pan before cutting into squares and serving.
6. Fluffy Pancakes

Fluffy pancakes are one of those breakfast staples that always bring a smile to my face. They’re so easy to make, and there’s just something magical about flipping a stack of golden, soft pancakes in the morning. If you’re new to baking or cooking, this fluffy pancake recipe is a fantastic place to start. With just a few simple ingredients, you can make pancakes that are light, airy, and perfect for topping with syrup, fruit, or whatever you love. There’s nothing quite like starting the day with a stack of homemade pancakes!
Servings: 4 servings (about 8 pancakes)
Ingredients:
- 1 cup all-purpose flour
- 2 tablespoons granulated sugar
- 1 teaspoon baking powder
- 1/2 teaspoon baking soda
- 1/4 teaspoon salt
- 1 cup buttermilk (or milk with 1 tablespoon vinegar)
- 1 large egg
- 2 tablespoons melted butter
- Additional butter or oil for cooking
Instructions:
- In a large bowl, whisk together the flour, sugar, baking powder, baking soda, and salt.
- In a separate bowl, mix the buttermilk, egg, and melted butter.
- Pour the wet ingredients into the dry ingredients and stir until just combined. Do not overmix; a few lumps are okay.
- Heat a non-stick skillet or griddle over medium heat and add a little butter or oil.
- Pour 1/4 cup of batter onto the skillet for each pancake. Cook until bubbles form on the surface and the edges look set, about 2-3 minutes.
- Flip and cook for an additional 1-2 minutes until golden brown.
- Serve warm with syrup, fruit, or your favorite toppings.
7. Lemon Bars

Lemon bars have always been one of my favorite desserts, especially when I’m craving something that’s both tart and sweet. The buttery crust combined with the tangy lemon filling is such a perfect balance. If you’re new to baking, this lemon bar recipe is a great place to start. It’s simple to make, and the results are absolutely delicious. With just a few ingredients, you’ll have a refreshing treat that’s sure to brighten up any day. Plus, they’re perfect for sharing with family and friends or just enjoying as a sweet pick-me-up!
Servings: 16 bars
Ingredients:
-
For the crust:
- 1 cup unsalted butter, softened
- 1/2 cup granulated sugar
- 2 cups all-purpose flour
- 1/4 teaspoon salt
-
For the filling:
- 1 cup granulated sugar
- 2 large eggs
- 1/3 cup fresh lemon juice (about 2-3 lemons)
- 1 tablespoon lemon zest
- 1/4 cup all-purpose flour
- Powdered sugar for dusting
Instructions:
- Preheat your oven to 350°F (175°C). Grease a 9×13-inch baking dish.
- In a medium bowl, cream together the softened butter and granulated sugar. Mix in the flour and salt until the mixture resembles coarse crumbs.
- Press the crust mixture evenly into the bottom of the prepared baking dish. Bake for 15-20 minutes or until lightly golden.
- While the crust is baking, prepare the filling. In a bowl, whisk together the granulated sugar, eggs, lemon juice, lemon zest, and flour until smooth.
- Pour the filling over the hot crust and bake for an additional 20-25 minutes, or until the filling is set and no longer jiggles.
- Let cool completely before cutting into squares. Dust with powdered sugar before serving.
8. Classic Rice Krispie Treats

Servings: 12 squares
Ingredients:
- 3 tablespoons unsalted butter
- 1 package (10 oz) marshmallows (or 4 cups mini marshmallows)
- 6 cups Rice Krispie cereal
- Optional: 1/2 teaspoon vanilla extract
Instructions:
- In a large saucepan, melt the butter over low heat. Add the marshmallows and stir until completely melted and smooth. If using, stir in the vanilla extract.
- Remove the saucepan from heat and add the Rice Krispie cereal. Stir until the cereal is evenly coated with the marshmallow mixture.
- Grease a 9×13-inch baking dish with butter or cooking spray. Press the mixture into the dish evenly using a spatula or your hands.
- Let the treats cool at room temperature for about 30 minutes before cutting into squares. Enjoy!
9. Simple Sugar Cookies

Servings: 24 cookies
Ingredients:
- 1 cup (2 sticks) unsalted butter, softened
- 1 1/2 cups granulated sugar
- 1 large egg
- 1 teaspoon vanilla extract
- 2 3/4 cups all-purpose flour
- 1 teaspoon baking soda
- 1/2 teaspoon baking powder
- 1/2 teaspoon salt
Instructions:
- Preheat your oven to 375°F (190°C) and line baking sheets with parchment paper.
- In a large bowl, cream together the softened butter and granulated sugar until smooth. Beat in the egg and vanilla extract.
- In a separate bowl, whisk together the flour, baking soda, baking powder, and salt. Gradually add this mixture to the wet ingredients, mixing until combined.
- Roll the dough into balls about 1 inch in diameter and place them on the prepared baking sheets, spacing them apart.
- Flatten each ball slightly with the bottom of a glass or your palm.
- Bake for 8-10 minutes or until the edges are lightly golden. Allow to cool on the baking sheets for a few minutes before transferring to wire racks to cool completely.
10. Classic Cheesecake

Classic cheesecake has always been one of those desserts that feels like a treat for any occasion. Its creamy, velvety texture and rich flavor make it a crowd favorite, and it’s surprisingly easy to make once you get the hang of it. If you’re new to baking, this classic cheesecake recipe is a great place to start – it’s simple, straightforward, and yields a beautiful, delicious result. With a buttery graham cracker crust and a smooth, tangy filling, this cheesecake is bound to impress everyone who tries it!
Servings: 8 slices
Ingredients:
-
For the crust:
- 1 1/2 cups graham cracker crumbs
- 1/4 cup granulated sugar
- 1/2 cup unsalted butter, melted
-
For the filling:
- 2 (8 oz) packages cream cheese, softened
- 1 cup granulated sugar
- 1 teaspoon vanilla extract
- 3 large eggs
- 1 cup sour cream
Instructions:
- Preheat your oven to 325°F (160°C). Grease a 9-inch springform pan.
- In a medium bowl, combine the graham cracker crumbs, sugar, and melted butter. Press the mixture firmly into the bottom of the prepared pan to form the crust.
- In a large mixing bowl, beat the softened cream cheese until smooth. Gradually add the sugar and vanilla, mixing until well combined.
- Add the eggs one at a time, mixing on low speed until just combined. Do not overmix.
- Stir in the sour cream until smooth. Pour the filling over the crust in the springform pan.
- Bake for 55-60 minutes, or until the center is set and slightly jiggly. Turn off the oven and leave the cheesecake inside for 1 hour to cool gradually.
- Remove from the oven and let cool completely at room temperature. Refrigerate for at least 4 hours before serving.
11. Basic Cornbread

Cornbread has always been one of those comforting, homey recipes I turn to when I want something warm and satisfying. It’s the perfect addition to any meal, especially with a bowl of chili or a hearty stew. If you’re new to baking, this basic cornbread recipe is a great starting point. It’s quick to make, uses simple ingredients, and results in a deliciously moist, slightly sweet bread that everyone will love. Plus, there’s nothing better than the smell of fresh cornbread straight from the oven!
Servings: 9 pieces
Ingredients:
- 1 cup cornmeal
- 1 cup all-purpose flour
- 1/4 cup granulated sugar
- 1 tablespoon baking powder
- 1/2 teaspoon salt
- 1 cup milk
- 1/4 cup unsalted butter, melted
- 2 large eggs
Instructions:
- Preheat your oven to 400°F (200°C). Grease an 8×8-inch baking dish or skillet.
- In a large bowl, mix together the cornmeal, flour, sugar, baking powder, and salt.
- In a separate bowl, whisk together the milk, melted butter, and eggs until well combined.
- Pour the wet ingredients into the dry ingredients and stir until just combined. Do not overmix.
- Pour the batter into the prepared baking dish and spread it evenly.
- Bake for 20-25 minutes, or until the top is golden brown and a toothpick inserted into the center comes out clean.
- Let cool slightly before cutting into squares and serving.
12. Chocolate Muffins

Chocolate muffins have always been one of my favorite treats, especially when I’m craving something indulgent yet easy to make. There’s just something about that rich, chocolatey flavor paired with a soft, moist texture that makes them irresistible. If you’re new to baking, this chocolate muffin recipe is the perfect place to start. It’s straightforward, uses simple ingredients, and the results are a batch of warm, decadent muffins that are perfect for breakfast, a snack, or even dessert. Trust me, once you try these, they’ll quickly become a regular in your baking routine!
Servings: 12 muffins
Ingredients:
- 1 3/4 cups all-purpose flour
- 1 cup granulated sugar
- 1/2 cup unsweetened cocoa powder
- 1 teaspoon baking powder
- 1/2 teaspoon baking soda
- 1/2 teaspoon salt
- 2 large eggs
- 1 cup milk
- 1/2 cup vegetable oil
- 1 teaspoon vanilla extract
- 1 cup chocolate chips (optional)
Instructions:
- Preheat your oven to 350°F (175°C) and line a muffin tin with paper liners.
- In a large bowl, whisk together the flour, sugar, cocoa powder, baking powder, baking soda, and salt.
- In another bowl, beat the eggs and then add the milk, vegetable oil, and vanilla extract. Mix until well combined.
- Pour the wet ingredients into the dry ingredients and stir until just combined. If using, fold in the chocolate chips.
- Divide the batter evenly among the muffin cups, filling each about 2/3 full.
- Bake for 18-20 minutes, or until a toothpick inserted into the center comes out clean.
- Let cool in the pan for a few minutes before transferring to a wire rack to cool completely.
13. Classic Pound Cake

Servings: 10 slices
Ingredients:
- 1 cup (2 sticks) unsalted butter, softened
- 1 cup granulated sugar
- 4 large eggs
- 1 teaspoon vanilla extract
- 2 cups all-purpose flour
- 1/2 teaspoon baking powder
- 1/4 teaspoon salt
- 1/2 cup milk
Instructions:
- Preheat your oven to 350°F (175°C). Grease and flour a 9×5-inch loaf pan.
- In a large mixing bowl, cream together the softened butter and sugar until light and fluffy.
- Add the eggs one at a time, mixing well after each addition. Stir in the vanilla extract.
- In a separate bowl, whisk together the flour, baking powder, and salt. Gradually add this mixture to the wet ingredients, alternating with the milk, and mix until just combined.
- Pour the batter into the prepared loaf pan and smooth the top.
- Bake for 60-70 minutes, or until a toothpick inserted into the center comes out clean.
- Let cool in the pan for 10 minutes before transferring to a wire rack to cool completely.
14. Oatmeal Raisin Cookies
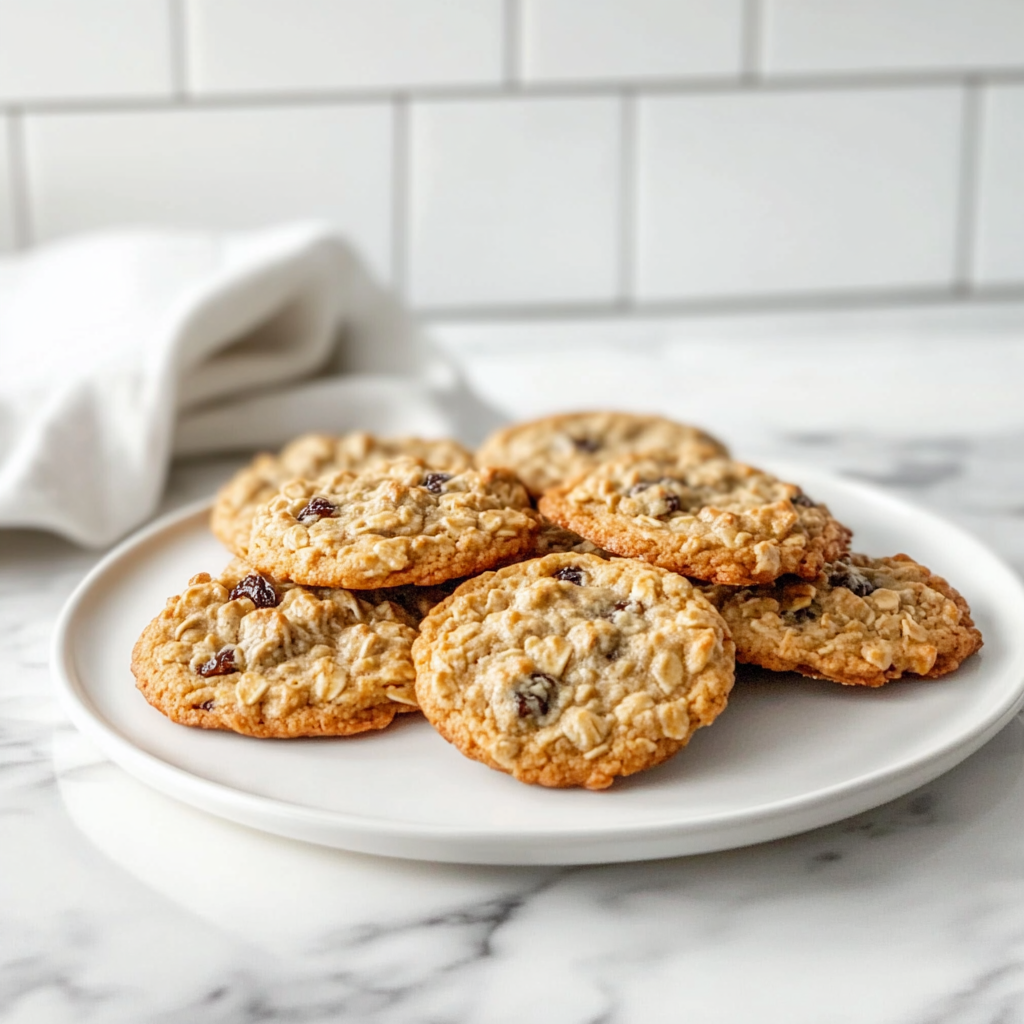
Servings: 24 cookies
Ingredients:
- 1 cup (2 sticks) unsalted butter, softened
- 3/4 cup granulated sugar
- 3/4 cup brown sugar, packed
- 1 teaspoon vanilla extract
- 2 large eggs
- 1 1/2 cups all-purpose flour
- 1 teaspoon baking soda
- 1/2 teaspoon salt
- 3 cups rolled oats
- 1 cup raisins
Instructions:
- Preheat your oven to 350°F (175°C) and line baking sheets with parchment paper.
- In a large bowl, cream together the softened butter, granulated sugar, brown sugar, and vanilla extract until smooth.
- Beat in the eggs one at a time until well combined.
- In a separate bowl, whisk together the flour, baking soda, and salt. Gradually add this mixture to the wet ingredients, mixing until just combined.
- Stir in the oats and raisins until evenly distributed.
- Drop rounded tablespoons of dough onto the prepared baking sheets, spacing them apart.
- Bake for 10-12 minutes, or until the edges are lightly golden. Let cool on the baking sheets for a few minutes before transferring to wire racks to cool completely.
15. Chocolate Lava Cake

Chocolate lava cake has always been one of my favorite desserts to make for special occasions or when I’m craving something extra indulgent. The moment you cut into the warm cake and that rich, gooey chocolate oozes out is pure magic. If you’re new to baking, this chocolate lava cake recipe is surprisingly simple to pull off, and the results are nothing short of impressive. With just a few ingredients and a little time, you’ll have individual cakes that are both decadent and delightful – a perfect treat to wow anyone with your baking skills!
Servings: 4 cakes
Ingredients:
- 1/2 cup (1 stick) unsalted butter
- 1 cup semi-sweet chocolate chips
- 2 large eggs
- 2 large egg yolks
- 1/4 cup granulated sugar
- 2 tablespoons all-purpose flour
- Pinch of salt
- Optional: powdered sugar and vanilla ice cream for serving
Instructions:
- Preheat your oven to 425°F (220°C). Grease four ramekins (6 oz each) and place them on a baking sheet.
- In a microwave-safe bowl, melt the butter and chocolate chips together in 30-second intervals, stirring until smooth.
- In a separate bowl, whisk together the eggs, egg yolks, and sugar until thick and pale.
- Stir the melted chocolate mixture into the egg mixture until well combined. Gently fold in the flour and salt until just combined.
- Divide the batter evenly among the prepared ramekins.
- Bake for 12-14 minutes, or until the edges are firm but the center is still soft.
- Let cool for 1 minute, then carefully invert each ramekin onto a plate. Serve warm, dusted with powdered sugar and with a scoop of vanilla ice cream if desired.
16. Classic Biscotti

- 2 cups all-purpose flour
- 1 cup granulated sugar
- 1/2 teaspoon baking powder
- 1/4 teaspoon salt
- 1/2 cup unsalted butter, softened
- 2 large eggs
- 1 teaspoon vanilla extract
- 1 teaspoon almond extract
- 1 cup sliced almonds
Instructions:
- Preheat your oven to 350°F (175°C). Line a baking sheet with parchment paper.
- In a large bowl, mix together the flour, sugar, baking powder, and salt.
- In another bowl, cream the softened butter until smooth. Add the eggs, vanilla extract, and almond extract, mixing until well combined.
- Gradually add the dry ingredients to the wet ingredients, mixing until just combined. Fold in the sliced almonds.
- Divide the dough in half and shape each half into a log about 12 inches long. Place the logs on the prepared baking sheet, spacing them apart.
- Bake for 25-30 minutes, or until golden brown. Remove from the oven and let cool for 10 minutes.
- Slice each log diagonally into 1/2-inch thick pieces. Return the slices to the baking sheet, cut side down, and bake for an additional 10-15 minutes, or until dry and crisp.
- Let cool completely before serving.
17. Classic Chocolate Cake

Classic chocolate cake has always been one of my favorites when I’m craving something rich, moist, and absolutely decadent. There’s just something about the deep chocolate flavor and the soft, fluffy texture that makes it the ultimate comfort food. If you’re new to baking, this classic chocolate cake recipe is perfect for getting started – it’s easy to follow and yields a beautifully rich cake every time. Whether you’re serving it at a special occasion or just because, this chocolate cake is sure to satisfy any chocolate lover’s cravings!
Servings: 8 slices
Ingredients:
- 1 3/4 cups all-purpose flour
- 3/4 cup unsweetened cocoa powder
- 2 cups granulated sugar
- 1 1/2 teaspoons baking powder
- 1 1/2 teaspoons baking soda
- 1 teaspoon salt
- 2 large eggs
- 1 cup whole milk
- 1/2 cup vegetable oil
- 2 teaspoons vanilla extract
- 1 cup boiling water
Instructions:
- Preheat your oven to 350°F (175°C). Grease and flour two 9-inch round cake pans.
- In a large mixing bowl, combine the flour, cocoa powder, sugar, baking powder, baking soda, and salt.
- Add the eggs, milk, vegetable oil, and vanilla extract to the dry ingredients. Mix on medium speed for 2 minutes.
- Stir in the boiling water until well combined (the batter will be thin).
- Pour the batter evenly into the prepared cake pans.
- Bake for 30-35 minutes, or until a toothpick inserted into the center comes out clean.
- Let the cakes cool in the pans for 10 minutes before transferring to wire racks to cool completely.
- Frost with your favorite chocolate frosting once cooled.
18. Peanut Butter Cookies

Peanut butter cookies have always been a nostalgic favorite for me, with their perfect balance of salty and sweet. The soft, slightly chewy texture combined with that signature peanut butter flavor makes them irresistible. If you’re new to baking, this peanut butter cookie recipe is a great one to try. It’s simple to make, uses just a few ingredients, and delivers a batch of delicious cookies that will satisfy any peanut butter lover. Whether you enjoy them as a snack or share them with friends and family, these cookies are sure to be a hit!
Servings: 24 cookies
Ingredients:
- 1 cup creamy or chunky peanut butter
- 1 cup granulated sugar
- 1 large egg
- 1 teaspoon vanilla extract
- 1/2 teaspoon baking soda
- 1/4 teaspoon salt
Instructions:
- Preheat your oven to 350°F (175°C) and line baking sheets with parchment paper.
- In a large bowl, combine the peanut butter, sugar, egg, vanilla extract, baking soda, and salt. Mix until well combined.
- Roll the dough into 1-inch balls and place them on the prepared baking sheets, spacing them apart.
- Using a fork, press down on each ball to create a crisscross pattern on top.
- Bake for 10-12 minutes, or until the edges are lightly golden.
- Let cool on the baking sheets for a few minutes before transferring to wire racks to cool completely.
19. Classic Carrot Cake

Servings: 12 slices
Ingredients:
For the Cake:
- 2 cups all-purpose flour
- 2 cups granulated sugar
- 1 teaspoon baking powder
- 1 teaspoon baking soda
- 1 teaspoon ground cinnamon
- 1/2 teaspoon salt
- 1 cup vegetable oil
- 4 large eggs
- 3 cups grated carrots (about 4-5 medium carrots)
- 1 cup crushed pineapple, drained (optional)
- 1/2 cup chopped walnuts or pecans (optional)
- 1 teaspoon vanilla extract
For the Cream Cheese Frosting:
- 8 oz cream cheese, softened
- 1/2 cup unsalted butter, softened
- 4 cups powdered sugar
- 1 teaspoon vanilla extract
Instructions:
- Preheat your oven to 350°F (175°C). Grease and flour two 9-inch round cake pans.
- In a large bowl, whisk together the flour, sugar, baking powder, baking soda, cinnamon, and salt.
- In another bowl, beat together the oil, eggs, and vanilla extract until well combined.
- Gradually add the wet ingredients to the dry ingredients, mixing until just combined. Fold in the grated carrots, crushed pineapple (if using), and nuts (if using).
- Divide the batter evenly between the prepared cake pans.
- Bake for 25-30 minutes, or until a toothpick inserted into the center comes out clean. Let the cakes cool in the pans for 10 minutes, then transfer to wire racks to cool completely.
- In a mixing bowl, beat the softened cream cheese and butter together until smooth. Gradually add the powdered sugar and mix until well combined. Stir in the vanilla extract.
- Once the cakes are completely cooled, place one layer on a serving plate. Spread a layer of cream cheese frosting on top.
- Place the second cake layer on top and frost the top and sides of the cake with the remaining frosting. Add chopped nuts if using.
- Slice and enjoy your delicious homemade carrot cake!
20. Basic Scones

Servings: 8 scones
Ingredients:
- 2 cups all-purpose flour
- 1/4 cup granulated sugar
- 1 tablespoon baking powder
- 1/2 teaspoon salt
- 1/2 cup unsalted butter, cold and cubed
- 1/2 cup milk
- 1 large egg
- Optional: 1 cup of add-ins (such as blueberries, chocolate chips, or dried fruit)
Instructions:
- Preheat your oven to 400°F (200°C) and line a baking sheet with parchment paper.
- In a large bowl, whisk together the flour, sugar, baking powder, and salt.
- Cut in the cold butter using a pastry cutter or your fingers until the mixture resembles coarse crumbs.
- In a separate bowl, whisk together the milk and egg. Add to the flour mixture and stir until just combined. If using, fold in your chosen add-ins.
- Turn the dough out onto a lightly floured surface and knead gently until just smooth. Pat the dough into a circle about 1-inch thick.
- Cut into 8 wedges and place on the prepared baking sheet.
- Bake for 15-20 minutes, or until golden brown. Let cool slightly before serving.
21. Classic Fruit Tart

Servings: 8 slices
Ingredients:
-
For the crust:
- 1 1/2 cups all-purpose flour
- 1/2 cup powdered sugar
- 1/2 cup unsalted butter, softened
- 1 large egg yolk
- 1/2 teaspoon vanilla extract
-
For the pastry cream:
- 2 cups whole milk
- 1/2 cup granulated sugar
- 1/4 cup cornstarch
- 4 large egg yolks
- 2 tablespoons unsalted butter
- 1 teaspoon vanilla extract
-
For the topping:
- Assorted fresh fruits (such as strawberries, kiwi, blueberries, and raspberries)
- Optional: apricot glaze for shine
Instructions:
- Make the crust: Preheat your oven to 350°F (175°C). In a mixing bowl, combine the flour and powdered sugar. Add the softened butter, egg yolk, and vanilla extract, mixing until a dough forms. Press the dough into the bottom and up the sides of a tart pan.
- Bake for 20-25 minutes or until golden brown. Let cool completely.
- Make the pastry cream: In a saucepan, heat the milk and 1/4 cup of sugar over medium heat until just boiling. In a separate bowl, whisk together the cornstarch, remaining sugar, and egg yolks. Gradually add the hot milk to the egg mixture, whisking constantly.
- Return the mixture to the saucepan and cook over medium heat, stirring constantly until thickened. Remove from heat and stir in the butter and vanilla extract. Let cool.
- Once the crust and pastry cream are cool, spread the pastry cream evenly in the tart shell. Arrange the fresh fruits on top.
- If desired, brush the fruits with apricot glaze for shine. Chill in the refrigerator for at least 1 hour before serving.
Baking is such a rewarding experience, and there’s no better feeling than creating something from scratch that you and your loved ones can enjoy. Whether you’re just starting out or looking for a new recipe to try, these classic baking recipes are a great way to build your skills and create delicious treats along the way. Remember, every bake is a chance to learn and improve, so don’t be afraid to experiment and have fun in the kitchen. Happy baking, and I hope these recipes bring as much joy to your kitchen as they have to mine!


