
Classic American Diner Recipes You Can Make at Home
There’s just something about classic American diner food that makes me feel all warm and nostalgic inside. Maybe it’s the sizzling burgers, the crispy fries, or those oh-so-creamy milkshakes. Whatever it is, I can’t get enough of those comforting diner vibes! And the best part? You don’t have to hit the road to enjoy these iconic dishes, you can make them right in your own kitchen. Trust me, nothing beats the feeling of sinking your teeth into a homemade diner burger while sipping on a frosty milkshake.
I’ve spent a lot of time perfecting some of my favorite diner recipes so I can recreate that magic at home. From the all-American bacon cheeseburger to classic diner-style pancakes, I’ve got you covered with recipes that’ll transport you straight to your favorite booth. These dishes are packed with flavor, nostalgia, and that special diner charm that makes you feel like you’re dining in the heart of the 1950s.
Whether you’re craving a juicy burger, a comforting bowl of mac and cheese, or a sweet treat to finish it all off, I’ve gathered all the classics that make diners so irresistible. So, pull up a chair and let’s get cooking! You’ll have your very own diner feast in no time, no waitstaff needed.
1. Grilled Bacon Cheeseburger

Okay, let’s talk about the ultimate diner classic: the grilled bacon cheeseburger. There’s just something about the crispy bacon, melted cheese, and that juicy burger patty that makes every bite feel like a celebration. This recipe is my go-to when I’m craving that perfect diner-style burger but want to skip the drive-thru. With a few simple ingredients and a hot grill, you’ll have a mouthwatering bacon cheeseburger that’s better than any diner. Trust me, this one’s going to be a hit at your next cookout or weeknight dinner!
Read more about this recipe and print off a recipe card here.
Servings: 4 burgers
Ingredients:
- 1 pound ground beef
- ½ tsp salt
- ¼ tsp pepper
- 4 slices of cheese (American or cheddar)
- 4 burger buns
- 1 small lettuce
- ½ cup pickled pink onion
- Ketchup, mustard, mayonnaise
- 4 slices of bacon
- ½ cup pickled gherkins
- 1 tomato
- Cooking spray
Instructions:
-
Preheat the grill to medium-high heat.
-
In a bowl, gently mix the ground beef with salt and pepper. Be careful not to overwork the meat. Form the mixture into 4 equal patties, making a slight indentation in the center of each to prevent puffing during cooking.
-
Place the patties on the grill. Use a cooking spray or a teaspoon of olive oil. Grill for about 4-5 minutes on one side, then flip and cook for another 3-4 minutes for medium-rare, or longer if you prefer them well done.
-
In the last minute of cooking, add a slice of cheese to each patty.
-
Grill the bacon until crispy.
-
Place the cooked patties on the bottom half of the buns. Add bacon and your favorite toppings, such as pickled onions, lettuce, tomato slices, gherkins, and condiments. Top with the other half of the bun.
-
Serve your burgers with a side of chips, fries, or a salad and enjoy!
2. Grilled Hotdogs

Grilled hotdogs are one of those classic diner foods that never go out of style, and for good reason! Whether you’re enjoying them at a summer BBQ or just craving a quick, tasty meal, there’s something about a perfectly grilled hotdog that hits the spot. Throw on some mustard, relish, or even some grilled onions, and you’ve got yourself a simple yet satisfying treat. This recipe takes me back to those fun diner days, and with a grill involved, it’s the perfect way to bring that smoky flavor right to your backyard! You won’t believe how easy it is to make these at home, and they’re just as tasty as you remember!
Read more about this recipe and print off a recipe card here.
Servings: 8 hotdogs
Ingredients:
- 8 hotdogs
- 8 classic hotdog buns
- Ketchup
- Mustard
- Mayonnaise (optional)
Toppings (choose a selection based on preference):
- 1 cup shredded cheddar cheese
- 6-8 small, pickled gherkins
- ½ cup chopped onions (raw or grilled)
- ¾ cup diced tomatoes
- Fresh herbs (such as cilantro or chives)
Instructions:
-
Preheat your grill to medium-high heat (about 375°F to 400°F).
-
If desired, make shallow diagonal cuts in the hot dogs to help them cook evenly and get a nice char.
-
Place the hot dogs on the grill and cook for about 6-8 minutes, turning occasionally, until they are heated through and have nice grill marks.
-
In the last 1-2 minutes of grilling, place the hot dog buns on the grill to lightly toast them, watching closely to prevent burning.
-
Once the hot dogs are done, remove them from the grill and place each one inside a toasted bun.
-
Set up a topping station with sliced tomatoes, shredded onions, cheese, and your favorite sauces like mustard or ketchup, so guests can customize their hot dogs. Enjoy!
3. Potato Salad

Potato salad is one of those side dishes that instantly reminds me of classic diner meals and summer cookouts. It’s creamy, tangy, and has just the right balance of flavors to complement any main dish. This version is super easy to make and packs in all the comfort you’d expect from a traditional diner potato salad. With a rich, mayo-based dressing and the perfect crunch from the celery, it’s a must-have for any diner-inspired spread.
Read more about this recipe and print off a recipe card here.
Servings: 6 servings
Ingredients:
- 2 pounds of potatoes (Yukon Gold or red potatoes work well)
- 1 cup mayonnaise
- 2 tablespoons Dijon mustard
- 1 teaspoon garlic powder
- ½ teaspoon salt
- 3 hard-boiled eggs, chopped
- ½ cup red onion, finely chopped
- ¼ teaspoon ground pepper
- Fresh parsley or dill for garnish (optional)
Instructions:
-
Wash and scrub the potatoes, then cut them into evenly sized chunks. Place them in a large pot of salted water and bring to a boil. Cook for about 15-20 minutes until tender, testing with a fork to ensure they are soft but not falling apart. Drain and allow to cool slightly.
-
In a large bowl, whisk together the mayonnaise, Dijon mustard, garlic powder, salt, and pepper.
-
Once the potatoes are cool enough to handle, cut them into bite-sized pieces (if not already). Gently fold in the chopped hard-boiled eggs, a pinch of ground pepper, red onion, and mix with the dressing.
-
Cover the bowl and refrigerate for at least 1 hour to allow the flavors to meld.
-
Before serving, taste and adjust seasoning if necessary. Garnish with fresh parsley or dill if desired.
4. Avocado Deviled Eggs
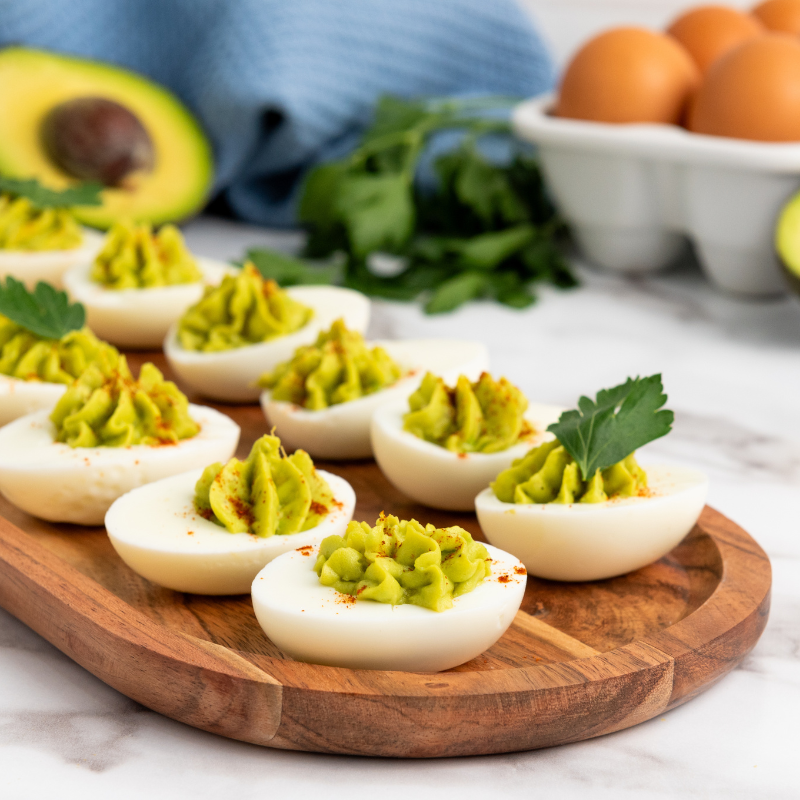
Avocado deviled eggs are a fun twist on the classic diner favorite, and let me tell you, they’re a total game changer! Creamy, flavorful, and just the right amount of rich with that smooth avocado filling, these deviled eggs take the humble appetizer to a whole new level. They’re perfect for a laid-back diner-style spread or even as a crowd-pleasing snack at your next get-together. The best part? They’re super easy to make, and the avocado adds a fresh, creamy vibe that makes them just irresistible! Trust me, once you try these, you’ll never look at regular deviled eggs the same way again.
You can read more about this recipe here.
Servings: 12
Ingredients:
- 6 eggs
- 1 avocado
- 2 tbsp sour cream
- ½ lemon, juiced
- Salt, to taste
- Black pepper, to taste
- Parsley, for garnish
- Paprika powder, for garnish
Instructions:
- Fill a pot with water and bring it to a boil over medium-high heat.
- Gently lower the eggs into the boiling water and cook them for 8-10 minutes.
- Once cooked, transfer the eggs to a bowl of ice water to cool completely.
- While the eggs cool, peel and mash the avocado in a separate bowl until smooth.
- Carefully peel the eggs, slice them in half lengthwise, and remove the yolks.
- Add the yolks to the mashed avocado, then mix in the sour cream, lemon juice, salt, and pepper until smooth and creamy.
- Rinse the egg whites to remove any excess yolk and pat them dry.
- Spoon or pipe the avocado filling back into the egg whites, creating a neat swirl or mound.
- Sprinkle with paprika and fresh parsley for garnish, then serve and enjoy!
5. BLT Sandwich

Ah, the BLT sandwich, simple, but oh so delicious. There’s something about the crispy bacon, fresh lettuce, and juicy tomato stacked between two slices of perfectly toasted bread that makes every bite feel like a little moment of joy. It’s a diner staple that never disappoints, whether you’re having it for lunch, a quick dinner, or even as a snack. This recipe brings together all the classic flavors you love, and with just a few ingredients, you’ll have a sandwich that’s both satisfying and full of that nostalgic diner charm. Trust me, once you dig into this BLT, you’ll be hooked!
Servings: 2 sandwiches
Ingredients:
- 8-12 slices of cooked bacon
- 4 slices of your favorite bread (white, whole wheat, sourdough, etc.)
- 4 leaves of lettuce (romaine, iceberg, or your choice)
- 4 slices of ripe tomato
- 4 tablespoons mayonnaise
- Salt and freshly ground black pepper, to taste
Instructions:
-
Wash and dry the lettuce leaves, then slice the tomatoes into thick slices.
-
Spread 1 tablespoon of mayonnaise on one side of each toasted bread slice.
-
On two slices of bread, layer the lettuce leaves.
-
Add the tomato slices on top of the lettuce and season with a little salt and pepper.
-
Place 4-6 slices of prepared bacon on top of the tomato for each sandwich, depending on your preference.
-
Top with the remaining slices of bread, mayonnaise side down. Press gently to hold everything together.
-
Slice each sandwich in half, if desired, and serve immediately.
6. Chicken Club Sandwich

The chicken club sandwich is the kind of meal that never goes out of style. Packed with tender grilled chicken, crispy bacon, fresh lettuce, and juicy tomato, all piled high between slices of toasted bread, it’s the perfect combination of flavors and textures. It’s hearty enough to satisfy your hunger but light enough to make it feel like a treat.
Servings: 2 sandwiches
Ingredients:
- 3 slices of white bread (1.5 for toasting, 1.5 for the sandwich)
- 2 tbsp mayonnaise
- 2 lettuce leaves
- 2 slices of deli chicken breast
- 2 slices of American cheese
- 4 slices of cooked bacon
- 1 tomato, sliced
Instructions:
- Toast three slices of white bread until they’re crispy and golden brown.
- Spread a thin layer of mayonnaise on one side of each toasted slice.
- Place one slice of bread, mayo-side up, on a plate or cutting board to form the base.
- Layer on 1 lettuce leaf, 1 slice of deli chicken, 1 slice of cheese, and 2 crispy bacon slices.
- Place the second slice of bread on top, mayo-side down, and spread a bit of mayo on the top side of that slice.
- Add another layer of toppings: 1 lettuce leaf, 1 slice of deli chicken, 1 slice of cheese, 2 bacon slices, and a few tomato slices.
- Finish with the third slice of bread, mayo-side down.
- Press the sandwich gently to help it hold together, then slice it diagonally or into quarters.
- Serve immediately and enjoy this stacked, flavorful creation!
7. Chopped Salad
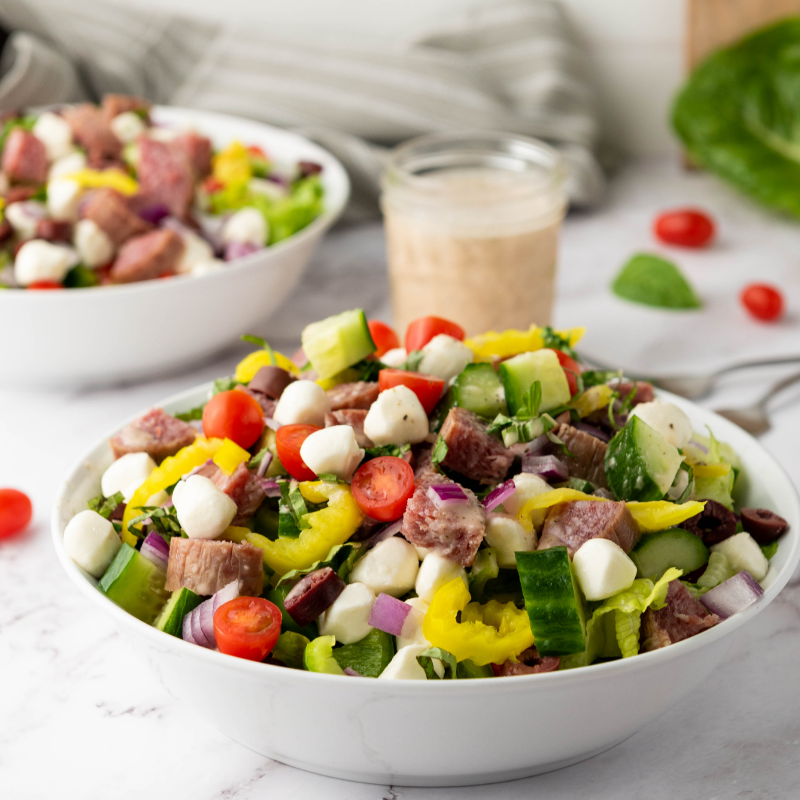
This chopped salad is packed with all the fresh, vibrant flavors you’d expect from a classic diner-style salad, but with a bit of a zesty twist. With a mix of crisp Romaine lettuce, juicy cherry tomatoes, crunchy cucumbers, and tangy black olives, it’s the kind of salad that makes every bite feel exciting. Plus, the combination of mozzarella cheese, salami, and banana peppers adds a satisfying richness that takes it to the next level. And don’t even get me started on that homemade zesty dressing, it’s the perfect balance of tangy and savory, making this salad a total standout.
Read more about this recipe and print off a recipe card here.
Servings: 4
Ingredients:
For the Salad:
- 4 cups of Romaine lettuce, chopped
- 1 cup of cherry tomatoes, halved
- 1 cup of cucumber, diced
- 1/2 cup of red onion, thinly sliced
- 1/2 cup of black olives, pitted and sliced
- 1/2 cup of fresh mozzarella cheese, cubed
- 1/2 cup of green bell peppers, diced
- 1/4 cup of banana peppers, sliced
- 1/4 cup of salami, sliced
- 2 tablespoons of chopped fresh basil
- 2 tablespoons of chopped fresh parsley
For the Zesty Dressing:
- 1/2 cup extra-virgin olive oil, preferably labeled “extra-light tasting”
- 1/4 cup red wine vinegar
- 1 garlic clove, minced
- 1 teaspoon Dijon mustard
- 2 tablespoons fresh lemon juice (from 1 or 2 lemons)
- 1/2 teaspoon dried oregano
- 1/2 teaspoon sea salt
- 1/2 teaspoon freshly cracked black pepper
- 1 tablespoon sugar
Instructions:
-
Begin by preparing all the salad ingredients – chop, dice, and slice as needed.
-
In a deep glass container, combine the dressing ingredients and blend them thoroughly using an immersion blender.
-
To assemble the salad, layer the ingredients starting with the chopped lettuce, then add the halved cherry tomatoes, diced green bell peppers, cucumbers, cubed mozzarella, sliced salami, thinly sliced red onions, black olives, banana peppers, and finally, the chopped basil and parsley.
-
Top off the salad with the zesty dressing.
8. Fried Chicken

This recipe is all about bringing that crispy, golden perfection right to your kitchen. The secret lies in the seasoning and the right frying technique, which ensures every piece comes out with a satisfying crunch. Trust me, once you try this fried chicken, you’ll be hooked on recreating that diner experience at home. It’s a true classic that never goes out of style, and it’s just as fun to make as it is to eat!
Servings: 4 servings
Ingredients:
- 6 chicken drumsticks
- 2 cups all-purpose flour
- 2 cups buttermilk
- 1 teaspoon paprika
- 1 teaspoon garlic powder
- 1 teaspoon onion powder
- 1 teaspoon salt
- 1 teaspoon pepper
- Vegetable oil for frying
Instructions:
-
Rinse the chicken drumsticks and pat them dry.
-
Place the chicken in a bowl and pour buttermilk over them. Add half of the salt and pepper. Ensure the chicken is coated, then cover and chill for at least 2 hours.
-
In another bowl, mix the flour, paprika, garlic powder, onion powder, remaining salt, and remaining pepper to create the seasoned flour mix.
-
Remove the chicken from the buttermilk, letting any excess liquid drip off.
-
Roll the drumsticks in the seasoned flour, ensuring they are well coated. Press the flour onto the chicken for a crispy coating.
-
Heat vegetable oil in a deep fryer or deep pot to 350-375°F (175-190°C).
-
Carefully add the coated chicken to the hot oil, a few pieces at a time, making sure not to overcrowd the fryer. Fry for 12-15 minutes until golden brown, crispy, and cooked through. The internal temperature should reach 165°F (74°C).
-
Use a slotted spoon to remove the fried chicken and place them on paper towels to drain excess oil.
-
Let the chicken cool slightly before serving. Enjoy your buttermilk fried chicken with your favorite sides!
9. Chicken Parmesan

Chicken Parmesan is one of those classic diner dishes that always hits the spot. Crispy breaded chicken cutlets topped with melted mozzarella and smothered in rich marinara sauce, what’s not to love? It’s the ultimate comfort food that brings together all the flavors you crave, whether you’re serving it with a side of spaghetti or enjoying it on its own with a crispy salad. This dish is perfect for a cozy dinner that feels like a special treat without any fuss.
Read more about this recipe and print off a recipe card here.
Servings: 2
Ingredients:
- 2 boneless, skinless chicken breasts
- Salt and pepper to taste
- 1 cup all-purpose flour
- 2 large eggs, beaten
- 1 cup breadcrumbs
- 1/2 cup grated Parmesan cheese
- 1/2 cup marinara sauce
- 1 cup shredded mozzarella cheese
- 2 tbsp olive oil
- Fresh basil leaves, chopped, for garnish (optional)
- Spaghetti or pasta of your choice, cooked, for serving (optional)
Instructions:
-
Preheat your oven to 200°C (400°F). Place chicken breasts between two sheets of plastic wrap and pound them to an even thickness, about 1/2 inch (1.3 cm) thick. Season both sides with salt and pepper.
-
Place the flour in a shallow dish, beaten eggs in another, and a mixture of breadcrumbs and Parmesan in a third. Dredge each chicken breast in the flour, shaking off the excess, dip in the egg, and coat with the breadcrumb mixture, pressing down to ensure it sticks.
-
In a large skillet, heat olive oil over medium heat. Add the chicken breasts and cook for 3-4 minutes on each side, until golden brown and crispy. Transfer the cooked chicken to a baking dish.
-
Spoon marinara sauce over each chicken breast, then sprinkle shredded mozzarella on top. Bake in the preheated oven for 10-15 minutes, or until the cheese is melted and bubbly, and the chicken is cooked through.
-
Garnish with fresh basil if desired and serve hot. For a complete meal, serve over spaghetti or your favorite pasta.
10. Corn Dogs

Corn dogs are the ultimate fun, finger food that brings all the nostalgia of a classic diner fair right to your kitchen. Crispy, golden batter on the outside with a juicy hot dog tucked inside, what’s not to love? They’re perfect for a casual meal, a fun snack, or even a summer cookout. Making them at home is easier than you think, and you’ll love the satisfying crunch of the cornmeal batter as you bite into the savory hot dog.
Read more about this recipe and print off a recipe card here.
Servings: 6
Ingredients:
- 6 hot dogs
- 6 wooden skewers or sticks
- 3/4 cup yellow cornmeal
- 3/4 cup all-purpose flour
- 1/4 teaspoon salt
- 1/4 teaspoon baking powder
- 1/8 teaspoon baking soda
- 1 tablespoon granulated sugar
- 1 large egg
- 3/4 cup buttermilk (or you can use regular milk with a tablespoon of vinegar or lemon juice added)
- Vegetable oil, for frying
Instructions:
-
Dry the hot dogs with paper towels and skewer them with wooden sticks, ensuring the stick is centered and goes about halfway up the hot dog.
-
In a large bowl, whisk together the cornmeal, flour, salt, baking powder, baking soda, and sugar. In a separate bowl, beat the egg and mix in the buttermilk. Pour the wet ingredients into the dry ingredients and stir until just combined. The batter should be thick enough to coat the hot dogs well. If it’s too thick, add a little more buttermilk.
-
Pour vegetable oil into a deep fryer or large pot, ensuring there’s enough oil to completely submerge the corn dogs. Heat the oil to 350°F (175°C) and use a thermometer to check the temperature.
-
Pour the batter into a tall glass for easier dipping. Dip each skewered hot dog into the batter, ensuring it’s completely coated. Let the excess batter drip off, then carefully lower it into the hot oil. Fry the corn dogs in batches, if necessary, for 2-3 minutes or until golden brown and crispy.
-
Once cooked, remove the corn dogs from the oil using a slotted spoon and drain them on paper towels to remove any excess oil.
-
Serve the corn dogs hot with your favorite condiments like ketchup, mustard, or mayonnaise.
11. Potato Fritters

Potato fritters are the ultimate crispy, golden snack that brings all the comfort of diner food with a satisfying crunch. Made with grated potatoes, seasoned just right, and fried to perfection, these fritters are perfect for any occasion, whether as a side dish, a snack, or even a fun addition to a diner-style breakfast. The outside gets wonderfully crispy while the inside stays soft and fluffy, making every bite a treat. Serve them with a dollop of sour cream or a side of ketchup, and you’ve got a simple, delicious dish that’s sure to become a favorite at your table!
Read more about this recipe and print off a recipe card here.
Servings: 12 fritters
Ingredients:
- 6 – 7 medium potatoes, boiled and peeled (about 2 pounds)
- 1 pound white cheese
- 1/4 cup cornmeal plus 2 tbsp for rolling the frittatas
- 4 large egg
- 3 tsp oregano
- 1 1/2 tsp smoked paprika
- 2 tablespoons chopped fresh parsley or green onions (optional)
- Salt and pepper to taste
- Vegetable oil, for frying
Instructions:
-
In a large bowl, combine the mashed potatoes, cheese, spices, 2 eggs, cornmeal, and salt to taste. Mix thoroughly until well combined.
-
Form the mixture into 12 tennis ball-sized portions, then flatten each slightly into a patty shape.
-
Heat about 1/4 inch of vegetable oil in a large skillet over medium heat.
-
Place cornmeal in a shallow dish.
-
Beat the remaining eggs in a separate deep dish.
-
Coat each potato patty in cornmeal, then dip it into the beaten eggs.
-
Once the oil is hot, add the patties in batches. Fry for 3–4 minutes on each side until golden brown and crispy. Do not overcrowd the pan.
-
Remove the fritters from the skillet and transfer them to a paper towel-lined plate to drain excess oil.
-
Serve immediately, topped with chopped parsley.
-
Optionally, serve with a dipping sauce like sour cream, garlic aioli, or ketchup.
12. Key Lime Pie
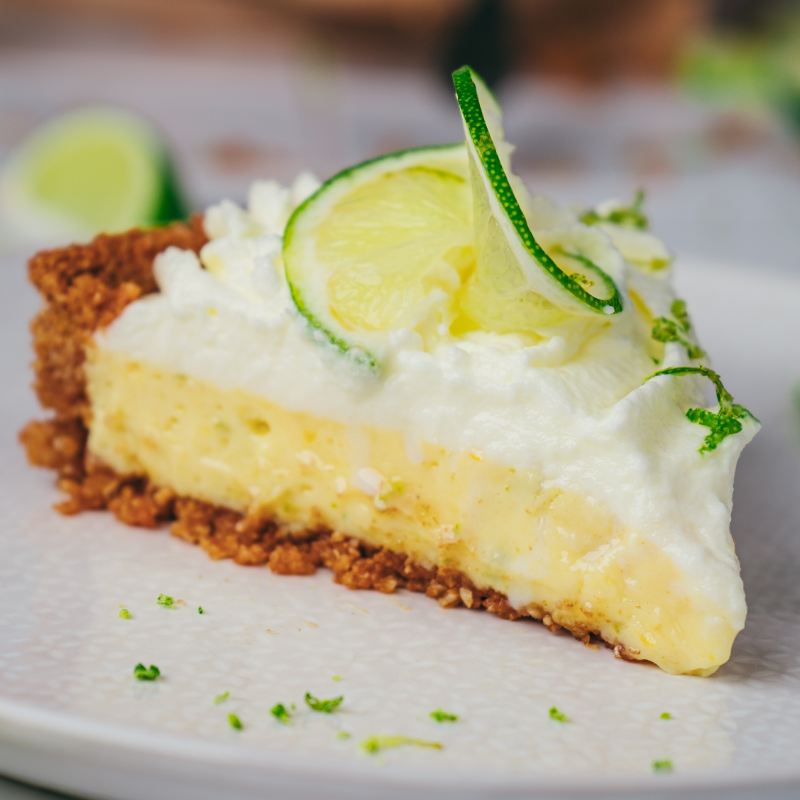
Key Lime Pie is a refreshing, tangy dessert that’s a total crowd-pleaser, and it’s one of those diner classics that always feels like a special treat. The combination of the creamy, tart lime filling with the sweet, buttery graham cracker crust is pure perfection. It’s the kind of dessert that’s light yet satisfying, with just the right balance of sweet and sour to finish off any meal. Whether you’re making it for a family dinner or serving it at a summer gathering, Key Lime Pie never fails to bring that nostalgic diner vibe with every bite!
Read more about this recipe and get a printable recipe card here.
Servings: 8-10
Ingredients:
For the Graham Cracker Crust:
- 1 ½ cups (180 g) graham cracker crumbs
- ⅓ cup (65 g) granulated sugar
- ½ teaspoon salt
- 6 tablespoons (85 g) unsalted butter, melted
For the Key Lime Filling:
- 4 large egg yolks
- 1 can (14 oz / 396 g) sweetened condensed milk
- ½ cup (120 ml) fresh key lime juice (about 12 key limes)
- 1 tablespoon key lime zest (or regular lime zest)
- ½ teaspoon vanilla extract
- ⅛ teaspoon salt
For the Whipped Cream Topping:
- 1 cup (240 ml) heavy whipping cream
- 2 tablespoons (15 g) powdered sugar
- ½ teaspoon vanilla extract
- Key lime zest, for garnish
Instructions:
- Preheat the oven to 350°F (175°C).
- In a bowl, mix graham cracker crumbs, sugar, salt, and melted butter until evenly combined.
- Press the mixture firmly into the bottom and sides of a 9-inch (23 cm) pie pan.
- Bake for 8 minutes, then let cool while preparing the filling.
- In a large bowl, whisk the egg yolks until slightly thickened.
- Whisk in the sweetened condensed milk, key lime juice, lime zest, vanilla extract, and salt until smooth.
- Pour the filling into the cooled crust and smooth the top.
- Bake at 350°F (175°C) for 12-15 minutes, until the center is just set (a slight jiggle is fine).
- Let the pie cool at room temperature for 30 minutes, then refrigerate for at least 3 hours (or overnight) until fully set.
- Using a hand mixer or stand mixer, beat heavy whipping cream, powdered sugar, and vanilla on medium-high speed until stiff peaks form.
- Spread or pipe the whipped cream on top of the chilled pie.
- Garnish with key lime zest and extra graham cracker crumbs if desired.
- Slice, serve, and enjoy!
13. Mac and Cheese

Mac and cheese is the ultimate comfort food, and it’s a true diner classic that never goes out of style. The creamy, cheesy goodness combined with tender pasta creates a dish that’s both satisfying and nostalgic. There’s something about that rich, velvety cheese sauce that makes every bite feel like a warm hug.
Read more about this recipe and print off a recipe card here.
Servings: 8
Ingredients:
- 16 oz elbow macaroni
- 3 cups sharp cheddar cheese, shredded
- 2 cups Gruyère cheese, shredded
- 1 stick unsalted butter, divided
- 1/4 cup all-purpose flour
- 3 cups whole milk
- 1 cup whipping cream
- 1/2 teaspoon smoked paprika
- Salt and pepper to taste
- 1 cup panko breadcrumbs
- 1/2 cup grated Parmesan cheese
Instructions:
-
Preheat your oven to 350°F (175°C). Lightly grease a 9×13-inch baking dish.
-
Cook the macaroni according to package instructions until al dente. Drain and set aside.
-
In a large saucepan, melt 1/2 stick (4 tablespoons) of butter over medium heat. Once melted, whisk in the flour and cook for 1-2 minutes until bubbly and lightly golden.
-
Gradually whisk in the milk and whipping cream, ensuring there are no lumps. Continue to cook, stirring constantly, until the mixture thickens, about 5-7 minutes.
-
Stir in the smoked paprika, salt, and pepper.
-
Remove the saucepan from heat and stir in the shredded sharp cheddar and Gruyère cheeses until fully melted and smooth.
-
Taste and adjust seasoning with salt and pepper as needed.
-
Add the cooked macaroni to the cheese sauce and stir until well combined.
-
Pour the macaroni and cheese mixture into the prepared baking dish.
-
In a small saucepan, melt the remaining 1/2 stick (4 tablespoons) of butter. Once melted, mix in the panko breadcrumbs until they are well coated.
-
In a small bowl, combine the buttered panko breadcrumbs and grated Parmesan cheese.
-
Sprinkle the breadcrumb mixture evenly over the macaroni and cheese.
-
Bake in the preheated oven for 20-25 minutes, or until the top is golden brown and the sauce is bubbling around the edges.
-
For a crispier topping, you can broil the dish for an additional 2-3 minutes, keeping a close eye to prevent burning.
-
Remove from the oven and let it sit for a few minutes before serving.
14. Homemade Lemonade

Homemade lemonade is the kind of refreshing, nostalgic drink that instantly takes me back to sunny days and cozy diner vibes. The perfect balance of tart lemon juice and sweet sugar, it’s a drink that never goes out of style. Making it from scratch is so easy, and it’s the best way to enjoy that fresh, zesty flavor that just screams summer.
Read more about this recipe and print off a recipe card here.
Servings: 6-8 servings
Ingredients:
- 1 cup freshly squeezed lemon juice (about 4-6 lemons)
- 4 cups water (divided)
- 1 cup granulated sugar or simple syrup
- Ice
- Lemon slices and mint for garnish (optional)
Instructions:
-
Squeeze the juice from the lemons until you have about 1 cup of lemon juice, removing any seeds.
-
In a saucepan, combine 1 cup of sugar with 1 cup of water and heat until the sugar dissolves completely. Let it cool.
-
In a pitcher, mix the lemon juice, simple syrup, and 3 cups of cold water. Stir well and adjust the sweetness to taste.
-
Pour over ice, garnish with lemon slices and fresh mint if desired, and enjoy!
15. Oreo Milkshake

An Oreo milkshake is the ultimate indulgence and a true diner classic. The creamy, ice-cold shake combined with the crunch of crumbled Oreos creates a perfect blend of flavors and textures that’s both nostalgic and delicious. It’s the kind of treat that takes you back to those carefree diner moments when you’d sip on something sweet while catching up with friends or family. Super easy to make and totally customizable, this Oreo milkshake is a fun and tasty way to satisfy your sweet tooth and enjoy a little bit of diner magic right at home!
You can read more about this recipe here.
Ingredients:
- 2 cups vegan vanilla ice cream (I used So Delicious vanilla bean coconut milk)
- 1/2 cup vegan milk (I used oat milk)
- 10 Oreos
- 1/3 cup vegan semi-sweet chocolate chips (I used Nestle Toll House)
Instructions:
-
In a blender add the ice cream, milk, Oreos and chocolate chips and mix until smooth.
-
Pour in a glass and serve immediately.
-
Enjoy!
16. Pancakes with Maple Syrup

Pancakes with maple syrup are the quintessential diner breakfast that never fails to bring a smile to my face. Fluffy, soft pancakes stacked high and drenched in rich, golden maple syrup, what could be better? This classic dish is comfort in every bite, and it’s so easy to make at home, you’ll feel like you’re sitting at your favorite diner booth, enjoying the morning with a cup of coffee on the side. Whether you top them with butter, fruit, or just the syrup, pancakes with maple syrup are the perfect way to start your day or treat yourself to a little breakfast indulgence anytime!
Servings: 4 (about 8 pancakes)
Ingredients:
- 1 cup all-purpose flour
- 2 tbsp sugar
- 1 tsp baking powder
- 1/2 tsp baking soda
- 1/4 tsp salt
- 1 cup buttermilk
- 1 large egg
- 2 tbsp melted butter (plus extra for cooking)
- Maple syrup for serving
Instructions:
- In a large bowl, whisk together the flour, sugar, baking powder, baking soda, and salt.
- In another bowl, whisk the buttermilk, egg, and melted butter together.
- Pour the wet ingredients into the dry ingredients and mix until just combined (some lumps are okay).
- Heat a skillet or griddle over medium heat and melt a little butter. Pour 1/4 cup of batter for each pancake onto the skillet.
- Cook until bubbles form on the surface, about 2-3 minutes, then flip and cook for another 1-2 minutes until golden brown.
- Serve warm with maple syrup drizzled on top.
From crispy fried chicken to creamy mac and cheese, these classic diner recipes are all about bringing that cozy, nostalgic vibe right into your kitchen. Each dish is simple to make and packed with flavors that’ll remind you of those laid-back diner days. If you’re craving something savory or looking for a sweet treat to wrap things up, these recipes have you covered. It’s time to have a little fun in the kitchen, enjoy some delicious comfort food, and share it with the people you love. Trust me, you’re going to love every bite!


