
21 Delicious Hot Food Ideas for a Party
Planning a party and need some hot food ideas? You’re in the right spot! I absolutely love hosting gatherings, and there’s just something about hot dishes that make the whole house feel cozy and festive. These recipes are perfect for bringing people together over food that’s too good to resist. From the moment the first dish hits the table, I promise, your guests will be lining up for more.
I’ve rounded up 21 hot food ideas that’ll keep everyone satisfied. There’s a little bit of everything here, from cheesy, gooey snacks to crispy treats and a few dishes that pack a punch with flavor. These are the kinds of foods that make everyone go “wow” and keep them coming back for more. You won’t have to worry about anyone leaving hungry.
These recipes range from comfort food staples to fun finger foods and even some with a bit of a twist. They’re simple to make and guaranteed to be crowd-pleasers. I’m excited for you to try them, your party menu is about to get a whole lot tastier!
1. Smashed Potato Salad

If you’re a fan of classic potato salad but want to mix things up a little, this smashed potato salad is the answer. It’s got all the creamy goodness you love, but with a fun, rustic twist. The potatoes are smashed instead of diced, which adds extra texture and flavor in every bite. It’s super easy to throw together and a total crowd-pleaser, perfect for any party or get-together!
Read more about this recipe and print off a recipe card here.
Servings: 4
Ingredients:
- 1.5 pounds baby potatoes
- 2 tablespoons extra virgin olive oil
- 1 teaspoon sea salt
- 1/2 teaspoon black pepper
- 1/2 teaspoon smoked paprika
- 1/2 teaspoon garlic powder
- 1/2 small red onion, finely diced
- 1/4 cup fresh parsley, chopped
- 1/4 cup fresh dill, chopped
- 1/2 cup Greek yogurt
- 2 tablespoons mayonnaise
- 1 tablespoon Dijon mustard
- 1 tablespoon lemon juice
Instructions:
-
Preheat your oven to 425°F (220°C).
-
In a large pot, bring salted water to a boil. Add the baby potatoes and cook until fork-tender, about 15-20 minutes. Drain and let cool slightly.
-
Place the cooked potatoes on a baking sheet lined with parchment paper. Use a flat surface, like the bottom of a glass or a potato masher, to gently smash each potato to flatten slightly.
-
Drizzle the smashed potatoes with 1/8 cup olive oil and sprinkle with sea salt, black pepper, smoked paprika, and garlic powder. Toss gently to coat.
-
Bake in the preheated oven for 20-25 minutes, or until the potatoes are crispy and golden brown.
-
While the potatoes are baking, prepare the dressing by whisking together the Greek yogurt, mayonnaise, Dijon mustard, and lemon juice in a small bowl until smooth.
-
In a large bowl, combine the crispy smashed potatoes, diced red onion, parsley, and dill. Pour the dressing over the salad and toss gently to combine.
-
Serve the potato salad warm or at room temperature. Enjoy!
2. Air Fryer Hot Honey Chicken Tenders

These Air Fryer Hot Honey Chicken Tenders are a game-changer! They’re crispy on the outside, juicy on the inside, and drizzled with a sweet and spicy honey sauce that’s totally addictive. The air fryer makes them perfectly crispy with way less oil, so you can indulge without feeling guilty.
Servings: 4
Ingredients:
- 2 large boneless, skinless chicken breasts, cut into tenders
- 2 large eggs
- 2 tablespoons milk
- ½ teaspoon salt
- ½ teaspoon black pepper
- ½ teaspoon garlic powder
- ½ teaspoon smoked paprika
- ½ teaspoon onion powder
- 3 cups cornflakes, crushed into small pieces (not too fine)
- Cooking spray or oil (for baking/air frying)
- Store-bought hot honey (for drizzling and dipping)
Instructions:
-
Preheat the oven to 400°F (200°C) and line a baking sheet with parchment paper, or preheat the air fryer to 375°F (190°C) and spray the basket with cooking spray.
-
In a bowl, whisk together eggs, milk, salt, black pepper, garlic powder, smoked paprika, and onion powder. Place the crushed cornflakes in a separate shallow dish.
-
Dip each piece of chicken into the egg mixture, ensuring it’s fully coated, then roll in the crushed cornflakes, pressing gently to ensure they adhere. Place the coated chicken on the prepared baking sheet or air fryer basket.
-
For the oven, bake for 18-22 minutes, flipping halfway, until golden brown and the internal temperature reaches 165°F (75°C). For the air fryer, cook for 12-15 minutes, flipping halfway, until crispy and cooked through.
-
Drizzle store-bought hot honey over the crispy chicken or serve it on the side for dipping.
3. Air Fryer Sweet Potato Fries

Air Fryer Sweet Potato Fries are one of those perfect sides that everyone loves! They come out crispy and golden with just the right amount of sweetness. The best part? They’re so easy to make in the air fryer, and you get all the crunch without the extra oil. These fries are the ideal accompaniment to pretty much anything on your party spread, and they’re guaranteed to disappear in no time!
Read more about this recipe and print off a recipe card here.
Servings: 4
Ingredients:
- 4 medium sweet potatoes
- 2-3 tablespoons olive oil
- 1/2 teaspoon dry dill
- 1/2 teaspoon garlic powder
- 1/2 teaspoon paprika
- Salt and pepper to taste
Instructions:
- Wash and peel the sweet potatoes, then cut them into thin, uniform strips.
- Place the sweet potato strips in a large bowl and add the olive oil, salt, pepper, garlic powder, dry dill and paprika. Toss until the sweet potatoes are evenly coated.
- Preheat the air fryer to 400°F (200°C) for about 3-5 minutes.
- Divide the seasoned sweet potato strips into batches and place them in the air fryer basket in a single layer, without overcrowding.
- Cook the sweet potato fries in the air fryer for 12-15 minutes per batch, shaking or flipping halfway through cooking, until they are crispy and golden brown.
- Repeat with the remaining batches of sweet potato fries.
- Serve the sweet potato fries hot, with your favorite dipping sauce. Enjoy!
4. Asian Sticky Wings

These Asian Sticky Wings are a flavor explosion you won’t want to miss! The sweet and savory sauce gives them a sticky, glazed finish that’s totally irresistible. They’re perfect for finger food at any party, and the combination of garlic, ginger, and soy sauce brings so much depth to every bite. Trust me, once you try these, you’ll be making them again and again!
You can read more about this recipe here.
Servings: 8
Ingredients:
- 4 lbs (2 kg) chicken wings, separated into drumettes and wingettes
- 1/2 cup soy sauce
- 1/4 cup honey
- 3 tablespoons brown sugar
- 3 tablespoons rice vinegar
- 3 tablespoons oyster sauce
- 3 tablespoons hoisin sauce
- 1/4 cup sesame oil
- 6 cloves garlic, minced
- 2-inch piece of ginger, grated
- 2 teaspoons Chinese five-spice powder
- 1/2 cup water
- 2 tablespoons cornstarch mixed with 4 tablespoons water (to thicken sauce)
- 2 tablespoons sesame seeds, toasted
- 1 scallion, finely sliced
Instructions:
- In a large bowl, combine the soy sauce, honey, brown sugar, rice vinegar, oyster sauce, hoisin sauce, sesame oil, minced garlic, grated ginger, and Chinese five-spice powder. Whisk the mixture together until smooth and well-combined.
- Add the chicken wings to the marinade, ensuring each wing is fully coated. Cover the bowl with plastic wrap and refrigerate for at least 1 hour, or ideally overnight, to allow the flavors to penetrate the meat.
- Preheat your oven to 400°F (200°C). Line two baking sheets with foil or parchment paper for easy cleanup, and place a wire rack on each baking sheet.
- Arrange the marinated chicken wings in a single layer on the wire racks. Save the leftover marinade for later use. Bake the wings in the preheated oven for 35-40 minutes, flipping them halfway through, until they are golden and slightly charred around the edges.
- While the wings are baking, pour the reserved marinade into a saucepan. Add 1/2 cup of water and bring to a boil over medium heat. Once boiling, reduce the heat and let it simmer for 5-7 minutes until the sauce has reduced slightly. Stir in the cornstarch mixture and continue to simmer for an additional 2-3 minutes until the sauce thickens to a sticky consistency.
- Once the wings are done baking, transfer them to a large mixing bowl. Pour the thickened sauce over the wings and toss them to coat each wing evenly.
- Transfer the wings to a serving platter and sprinkle with toasted sesame seeds and sliced scallions for garnish.
- Serve the sticky chicken wings hot, paired with steamed rice or a fresh salad, and enjoy!
5. Baked Brie with Garlic & Honey

Baked Brie with Garlic & Honey is the ultimate crowd-pleasing appetizer. The creamy brie melts beautifully in the oven, and when paired with roasted garlic and a drizzle of honey, it’s pure magic. The combination of savory and sweet is so addictive, and it’s incredibly easy to put together. Serve it with some crackers or fresh bread, and watch it disappear in no time!
Read more about this recipe and print off a recipe card here.
Servings: 4
Ingredients:
- 1 wheel of Brie cheese (8 ounces)
- 3-4 cloves of garlic, thinly sliced
- 2 tablespoons honey
- 1 tablespoon olive oil
- Fresh rosemary sprigs (optional)
- Sliced baguette or crackers, for serving
Instructions:
- Preheat your oven to 350°F (175°C).
- Place the Brie wheel on a baking sheet lined with parchment paper or in a Brie baker if you have one.
- Using a small knife, make small slits on the top of the Brie. Insert the garlic slices into the slits, distributing them evenly across the cheese.
- Drizzle the honey over the top of the Brie, allowing it to seep into the slits and around the cheese.
- Drizzle the olive oil over the Brie as well, to enhance the flavors and help with the baking process.
- If desired, place a few fresh rosemary sprigs on top of the Brie to add an aromatic touch.
- Transfer the baking sheet or Brie baker to the preheated oven and bake for about 15-20 minutes, or until the Brie is soft and gooey in the center.
- Keep an eye on the Brie as it bakes to ensure it doesn’t melt completely and lose its shape.
- Once baked, carefully remove the Brie from the oven and allow it to cool slightly before serving.
- Serve the baked Brie with sliced baguette or crackers. Guests can scoop out portions of the warm, gooey cheese and enjoy the wonderful combination of flavors from the garlic and honey.
6. BBQ Chicken Flatbread

BBQ Chicken Flatbread is a flavor-packed, handheld treat that’s perfect for any party. The smoky barbecue sauce pairs perfectly with tender chicken, and the crispy flatbread adds just the right amount of crunch. Top it all off with melted cheese and a sprinkle of fresh herbs, and you’ve got a dish that’s both satisfying and totally delicious. It’s one of those recipes that’s as easy to make as it is to eat!
Read more about this recipe and print off a recipe card here.
Servings: 2
Ingredients:
For the base:
- 2 flatbreads (lavash, pita, or pre-made pizza crust)
For the topping:
- 200 g cooked or roasted chicken (shredded)
- 4-5 tbsp your favorite BBQ sauce
- 100 g shredded mozzarella cheese (or a mix of cheddar and mozzarella)
- 1 small red onion (thinly sliced)
- 1 small sweet pepper (thinly sliced, optional)
- 1-2 tbsp chopped fresh cilantro or parsley (for garnish)
For serving (optional):
- Sour cream or Greek yogurt
- Lime wedges
Instructions:
- Preheat your oven to 200°C (390°F). If using a pre-made pizza base, follow the package instructions.
- Arrange the flatbreads on a baking sheet lined with parchment paper.
- Toss the shredded chicken with 3 tbsp of BBQ sauce and let it sit for 5 minutes to absorb the flavor.
- Spread a thin layer of BBQ sauce (about 1 tbsp per flatbread) on each flatbread.
- Evenly distribute the BBQ chicken on top of each flatbread.
- Sprinkle with shredded cheese.
- Add sliced red onion and sweet pepper, if using.
- Place the flatbreads in the oven and bake for 10-12 minutes, or until the cheese has melted and lightly browned, and the edges of the flatbread are crispy.
- Remove from the oven and let them cool for a couple of minutes.
- Garnish with fresh cilantro or parsley.
- Optionally, serve with sour cream or Greek yogurt and lime wedges.
7. Buttermilk Fried Chicken

Buttermilk Fried Chicken is a classic comfort food that never goes out of style. The crispy, golden-brown coating is perfectly seasoned, while the meat inside stays juicy and tender. Soaking the chicken in buttermilk before frying gives it that extra flavor and tenderness you just can’t beat. It’s the kind of dish that makes every bite feel like a little celebration, and it’s bound to be the star of your party spread!
Servings: 6
Ingredients:
- 6 chicken drumsticks
- 2 cups all-purpose flour
- 2 cups buttermilk
- 1 teaspoon paprika
- 1 teaspoon garlic powder
- 1 teaspoon onion powder
- 1 teaspoon salt
- 1 teaspoon pepper
- Vegetable oil for frying
Instructions:
- Place the chicken in a bowl and pour buttermilk over them. Add half of the salt and pepper, ensuring the chicken is well coated. Cover and chill for at least 2 hours.
-
In another bowl, mix the flour, paprika, garlic powder, onion powder, and the remaining salt and pepper to create a seasoned flour mixture.
-
Take the chicken out of the buttermilk, letting any excess liquid drip off.
-
Roll the drumsticks in the seasoned flour, pressing the flour onto the chicken to ensure a crispy coating.
-
Heat vegetable oil in a deep fryer or deep pot to 350-375°F (175-190°C).
-
Carefully add the coated chicken pieces to the hot oil, a few at a time, making sure not to overcrowd the fryer. Fry for 12-15 minutes until golden brown, crispy, and cooked through. The chicken should reach an internal temperature of 165°F (74°C).
-
Use a slotted spoon to remove the fried chicken and place them on paper towels to drain excess oil.
-
Let the chicken cool for a few minutes before serving. Enjoy your buttermilk fried chicken with your favorite sides!
8. Corn Dogs

Corn Dogs are always a hit at parties, and for good reason! With their crispy, golden batter and juicy hot dog center, they’re the perfect combination of savory and satisfying. Whether you’re serving them as a snack or as part of a fun spread, these homemade corn dogs will have everyone coming back for more. Plus, they’re super easy to dip in your favorite sauces, making them even more irresistible!
Read more about this recipe and print off a recipe card here.
Servings: 6
Ingredients:
- 6 hot dogs
- 6 wooden skewers or sticks
- 3/4 cup yellow cornmeal
- 3/4 cup all-purpose flour
- 1/4 teaspoon salt
- 1/4 teaspoon baking powder
- 1/8 teaspoon baking soda
- 1 tablespoon granulated sugar
- 1 large egg
- 3/4 cup buttermilk (or you can use regular milk with a tablespoon of vinegar or lemon juice added)
- Vegetable oil, for frying
Instructions:
-
Dry the hot dogs with paper towels and skewer them with wooden sticks, ensuring the stick is centered and goes about halfway up the hot dog.
-
In a large bowl, whisk together the cornmeal, flour, salt, baking powder, baking soda, and sugar. In a separate bowl, beat the egg and mix in the buttermilk. Pour the wet ingredients into the dry ingredients and stir until just combined. The batter should be thick enough to coat the hot dogs well. If it’s too thick, add a little more buttermilk.
-
Pour vegetable oil into a deep fryer or large pot, ensuring there’s enough oil to completely submerge the corn dogs. Heat the oil to 350°F (175°C) and use a thermometer to check the temperature.
-
Pour the batter into a tall glass for easier dipping. Dip each skewered hot dog into the batter, ensuring it’s completely coated. Let the excess batter drip off, then carefully lower it into the hot oil. Fry the corn dogs in batches, if necessary, for 2-3 minutes or until golden brown and crispy.
-
Once cooked, remove the corn dogs from the oil using a slotted spoon and drain them on paper towels to remove any excess oil.
-
Serve the corn dogs hot with your favorite condiments like ketchup, mustard, or mayonnaise.
9. Potato Fritters

Potato Fritters are a crispy, golden bite of comfort in every mouthful. These little treats are packed with flavor, with a light, crispy exterior and soft, seasoned potato inside. They’re perfect for dipping, and honestly, they disappear faster than you can make them!
Read more about this recipe and print off a recipe card here.
Servings: 12 fritters
Ingredients:
- 6 – 7 medium potatoes, boiled and peeled (about 2 pounds)
- 1 pound white cheese
- 1/4 cup cornmeal plus 2 tbsp for rolling the frittatas
- 4 large egg
- 3 tsp oregano
- 1 1/2 tsp smoked paprika
- 2 tablespoons chopped fresh parsley or green onions (optional)
- Salt and pepper to taste
- Vegetable oil, for frying
Instructions:
-
In a large bowl, combine the mashed potatoes, cheese, spices, 2 eggs, cornmeal, and salt to taste. Mix thoroughly until well combined.
-
Form the mixture into 12 tennis ball-sized portions, then flatten each slightly into a patty shape.
-
Heat about 1/4 inch of vegetable oil in a large skillet over medium heat.
-
Place cornmeal in a shallow dish.
-
Beat the remaining eggs in a separate deep dish.
-
Coat each potato patty in cornmeal, then dip it into the beaten eggs.
-
Once the oil is hot, add the patties in batches. Fry for 3–4 minutes on each side until golden brown and crispy. Do not overcrowd the pan.
-
Remove the fritters from the skillet and transfer them to a paper towel-lined plate to drain excess oil.
-
Serve immediately, topped with chopped parsley.
-
Optionally, serve with a dipping sauce like sour cream, garlic aioli, or ketchup.
10. Pork Skewers

Pork Skewers are a savory, juicy bite that’s full of flavor in every skewer. Marinated in a blend of spices, they’re grilled to perfection with a slight char that gives them an irresistible smoky taste. Whether served as appetizers or a main dish, these skewers are easy to eat with one hand and full of bold, tasty goodness. They’ll definitely add a delicious, crowd-pleasing element to your party spread!
Servings: 6
Ingredients:
Grilled Marinated Pork Skewers:
- 1 lb pork (500 g), shoulder or tenderloin, cut into cubes
- 2 tbsp olive oil
- 2 tbsp soy sauce
- 1 tbsp lemon juice
- 1 tbsp honey
- 2 cloves garlic, minced
- 1 tsp smoked paprika
- 1 tsp dried oregano
- ½ tsp black pepper
- ½ tsp salt
- Wooden or metal skewers
Homemade Aioli:
- 1 egg yolk
- 1 tsp Dijon mustard
- 1 cup olive oil (240 ml) or a mix of olive and neutral oil
- 1 tsp lemon juice
- 1 garlic clove, finely minced or grated
- Salt to taste
Instructions:
For the Grilled Marinated Pork Skewers:
-
In a large bowl, combine olive oil, soy sauce, lemon juice, honey, garlic, smoked paprika, oregano, salt, and black pepper to make the marinade.
-
Add the pork cubes to the marinade, ensuring they are well coated. Cover and refrigerate for at least 1 hour (preferably overnight).
-
If using wooden skewers, soak them in water for 30 minutes to prevent burning.
-
Thread the marinated pork cubes onto the skewers.
-
Preheat the grill to medium-high heat. Grill the skewers for 10–12 minutes, turning occasionally, until the pork is golden brown and cooked through.
-
Serve the skewers hot with fresh vegetables, like crunchy radishes, and your favorite dipping sauce or side dishes.
For the Homemade Aioli:
-
In a medium bowl, whisk together the egg yolk and Dijon mustard until smooth.
-
While whisking continuously, slowly drizzle in the oil, starting drop by drop. Once the mixture begins to thicken, pour in the oil in a thin, steady stream.
-
When the mixture reaches a thick, mayonnaise-like consistency, stir in lemon juice and vinegar (if using). Continue whisking.
-
Stir in the minced garlic and season with salt to taste.
-
If the aioli is too thick, thin it out with a teaspoon of water or lemon juice.
-
Let the aioli rest in the fridge for 15–30 minutes to develop its flavors. Serve with fries, seafood, grilled vegetables, or sandwiches.
11. Ham & Cheese Sliders
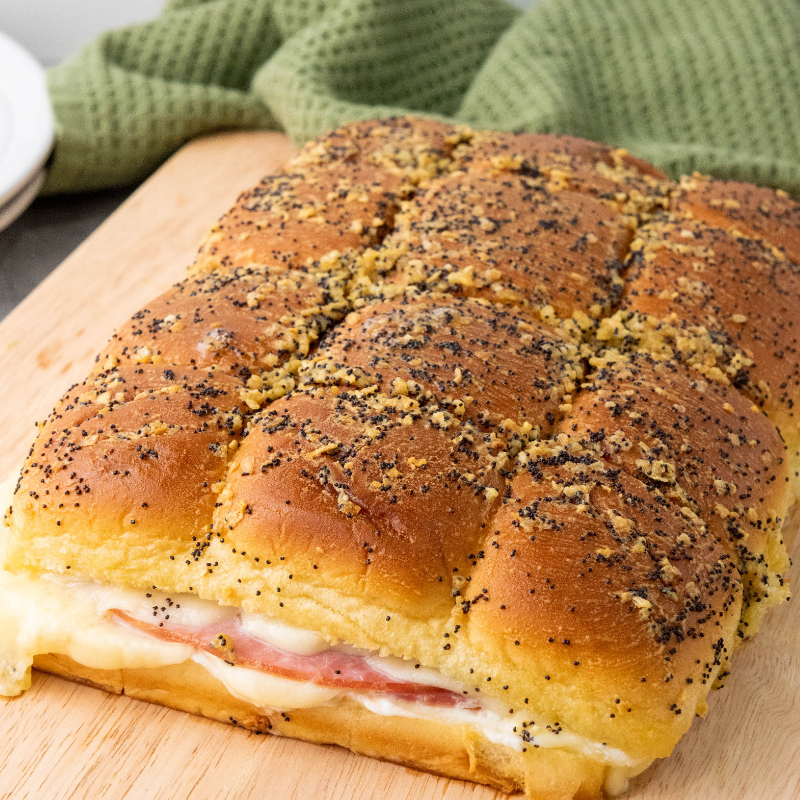
Ham & Cheese Sliders are the perfect bite-sized indulgence for any party! These little sandwiches are packed with savory ham, melty cheese, and a touch of mustard, all nestled between soft, fluffy buns. They’re easy to make, super flavorful, and the kind of dish that has everyone going back for seconds.
Read more about this recipe and print off a recipe card here.
Servings: 12 sliders
Ingredients:
- 12 slider buns (like Hawaiian rolls)
- ½ lb thinly sliced cooked ham
- 12 slices Swiss cheese
- ¼ cup mayonnaise
- 1 tbsp Dijon mustard
- 4 tbsp butter, melted
- 1 tbsp minced onion
- 1 tbsp poppy seeds
Instructions:
-
Preheat your oven to 350°F (175°C).
-
Cut the slider buns in half and place the bottom halves in a baking dish.
-
Spread mayonnaise on the buns, then layer Swiss cheese, ham, and more Swiss cheese on top. Cover with the top halves of the buns.
-
In a bowl, mix together melted butter, Dijon mustard, minced onion, and poppy seeds to make the glaze.
-
Brush the glaze generously over the top of the sliders, ensuring they are evenly covered.
-
Cover the baking dish with aluminum foil and bake for 15 minutes. Remove the foil and bake for an additional 5-10 minutes, or until the tops are lightly browned and crispy.
-
Let the sliders cool for a few minutes before serving.
12. Loaded Tater Tots

Loaded Tater Tots are the ultimate comfort food for any party! These crispy, golden tots are smothered in melted cheese, crispy bacon, and drizzled with sour cream, making every bite totally irresistible. They’re the perfect mix of salty, creamy, and crunchy, and they make a great snack or side dish that’ll keep everyone coming back for more.
Read more about this recipe and print off a recipe card here.
Servings: 4-6
Ingredients:
- 1 package of frozen tater tots (about 32 oz)
- 8 slices of bacon, chopped
- 1 cup queso
- 1/2 cup ranch dressing
- 2 scallions, thinly sliced
- Salt and pepper to taste
Instructions:
-
Preheat your oven to 425°F (220°C). If your tater tot package recommends a different temperature, adjust accordingly to accommodate both the tater tots and bacon.
-
Spread the tater tots in a single layer on a baking sheet. Bake according to the package instructions, usually around 20-25 minutes, until golden and crispy.
-
Arrange the bacon slices in a single layer on a baking rack set on a baking sheet. This allows the bacon to cook evenly.
-
Place both baking sheets in the oven. The bacon will need 15-20 minutes to become crispy, but start checking around 12 minutes to avoid overcooking. Once crispy, remove the bacon and let it cool slightly before chopping it into pieces.
-
Slice the scallions and chop the bacon.
-
Warm the queso in a microwave-safe bowl or on the stovetop for 2-3 minutes until heated through and pourable.
-
Once the tater tots are baked, transfer them to a large serving dish.
-
Drizzle the warm queso evenly over the crispy tater tots.
-
Sprinkle the chopped bacon on top.
-
Drizzle ranch dressing over the bacon and tater tots.
-
Garnish with the sliced scallions.
-
Finish with a light sprinkle of salt and pepper. Serve immediately while everything is still warm and inviting.
13. Mac and Cheese

Mac and Cheese is the ultimate crowd-pleasing comfort food that everyone can get behind. This creamy, cheesy dish is loaded with rich, velvety cheese sauce and tender pasta that’s perfectly baked to golden, bubbly perfection. It’s the kind of dish that warms you from the inside out and is perfect for any party or family gathering. Serve it as a side or make it the star of the show, either way, it’ll definitely be a hit!
Read more about this recipe and print off a recipe card here.
Servings: 8
Ingredients:
- 16 oz elbow macaroni
- 3 cups sharp cheddar cheese, shredded
- 2 cups Gruyère cheese, shredded
- 1 stick unsalted butter, divided
- 1/4 cup all-purpose flour
- 3 cups whole milk
- 1 cup whipping cream
- 1/2 teaspoon smoked paprika
- Salt and pepper to taste
- 1 cup panko breadcrumbs
- 1/2 cup grated Parmesan cheese
Instructions:
-
Preheat your oven to 350°F (175°C). Lightly grease a 9×13-inch baking dish.
-
Cook the macaroni according to package instructions until al dente. Drain and set aside.
-
In a large saucepan, melt 1/2 stick (4 tablespoons) of butter over medium heat. Once melted, whisk in the flour and cook for 1-2 minutes until bubbly and lightly golden.
-
Gradually whisk in the milk and whipping cream, ensuring there are no lumps. Continue to cook, stirring constantly, until the mixture thickens, about 5-7 minutes.
-
Stir in the smoked paprika, salt, and pepper.
-
Remove the saucepan from heat and stir in the shredded sharp cheddar and Gruyère cheeses until fully melted and smooth.
-
Taste and adjust seasoning with salt and pepper as needed.
-
Add the cooked macaroni to the cheese sauce and stir until well combined.
-
Pour the macaroni and cheese mixture into the prepared baking dish.
-
In a small saucepan, melt the remaining 1/2 stick (4 tablespoons) of butter. Once melted, mix in the panko breadcrumbs until they are well coated.
-
In a small bowl, combine the buttered panko breadcrumbs and grated Parmesan cheese.
-
Sprinkle the breadcrumb mixture evenly over the macaroni and cheese.
-
Bake in the preheated oven for 20-25 minutes, or until the top is golden brown and the sauce is bubbling around the edges.
-
For a crispier topping, you can broil the dish for an additional 2-3 minutes, keeping a close eye to prevent burning.
-
Remove from the oven and let it sit for a few minutes before serving.
14. Mini Pigs in Blankets

Mini Pigs in Blankets are the perfect bite-sized snack that never fails to impress! These little guys are wrapped in crispy, flaky puff pastry, with savory sausages tucked inside, making them the ultimate party food. Whether you’re serving them as appetizers or as part of a bigger spread, they’re always a crowd favorite. Plus, they’re so easy to pop in your mouth, you might end up eating more than you planned!
You can read more about this recipe here.
Servings: 24
Ingredients:
- 1 refrigerated can of croissant dough (with 12 croissants)
- 24 cocktail sausages (pre-cooked)
- 1-2 eggs, beaten (for egg wash)
- 1 tsp poppy seeds, for sprinkling
Instructions:
- Preheat the oven to the temperature indicated on the croissant dough package, typically 350°F (175°C).
- Open the refrigerated can of croissant dough and carefully unroll it to reveal 12 triangular pieces of dough.
- Cut along the perforated lines of the dough triangles to create 24 smaller triangles, providing enough dough to wrap around each mini sausage.
- Take a smaller dough triangle and place a mini sausage at the wide end. Roll the dough around the sausage. Repeat with all the sausages and dough triangles.
- In a small bowl, beat the eggs. Lightly brush each wrapped sausage with the beaten egg using a pastry brush or your fingers to help the dough brown nicely during baking.
- Sprinkle poppy seeds over the egg-washed dough-wrapped sausages for added visual appeal and a subtle nutty flavor.
- Place the prepared mini piggies in a blanket on a baking sheet lined with parchment paper, ensuring enough space between each for even baking.
- Bake in the preheated oven for 15-18 minutes, or until golden brown and the dough is fully cooked.
- Remove the mini piggies in a blanket from the oven and let them cool slightly before serving.
- Serve with your favorite dipping sauces like ketchup, mustard, or barbecue sauce.
15. Mini Salmon Quiches

Mini Salmon Quiches are the perfect mix of elegance and comfort. These little savory bites are packed with flaky crust, creamy filling, and a delicious hit of smoky salmon that makes each bite a treat. They’re light enough to serve as appetizers but satisfying enough to stand out on any party spread. Plus, they’re easy to eat in one bite, making them the ideal finger food for any gathering!
You can read more about this recipe here.
Servings: 12
Ingredients:
For the Crust:
- 1 cup all-purpose flour
- 1/4 cup unsalted butter, chilled and cubed
- 2-3 tablespoons ice cold water
- Pinch of salt
For the Filling:
- 1/2 cup smoked salmon, chopped
- 1/2 cup grated cheddar or Gruyere cheese
- 4 medium eggs
- 1/2 cup heavy cream
- Salt and pepper to taste
- Chopped dill to garnish
Instructions:
- For the Crust: Preheat the oven to 350°F (175°C).
- Grease and flour a mini muffin tin.
- In a bowl, mix the flour and salt. Add the cubed butter and blend gently until it resembles coarse crumbs.
- Gradually add the ice-cold water, 1 tablespoon at a time, mixing until the dough comes together.
- Roll out the dough on a floured surface and cut into circles to fit the mini muffin tin cups.
- Press the dough circles into the cups to form mini crusts. Prick the bottoms with a fork to prevent puffing. Place in the fridge while you prepare the filling.
- For the Filling: In a bowl, whisk together the eggs, cream, salt, and pepper until well combined.
- Place a small amount of chopped salmon and grated cheese into each mini crust.
- Pour the egg mixture over the salmon and cheese, filling each crust almost to the top.
- Place the muffin tin into the oven and bake for 15-20 minutes, or until the quiches are set and slightly golden on top.
- Once done, allow the quiches to cool for a few minutes, then carefully remove them from the muffin tin.
- Garnish with chopped dill before serving.
16. Onion Tart

Onion Tart is a savory, melt-in-your-mouth dish that’s perfect for any gathering. The caramelized onions bring out a deep, sweet flavor that pairs beautifully with the buttery, flaky crust. Topped with a little cheese, this tart is simple yet packed with rich, comforting flavors. It’s a unique dish that’ll definitely add a touch of sophistication to your party spread while still being a total crowd-pleaser!
Read more about this recipe and print off a recipe card here.
Servings: 6-8
Ingredients:
For the crust (shortcrust pastry):
- 200 g all-purpose flour
- 100 g cold unsalted butter (cut into cubes)
- 1 egg
- pinch of salt
- 1-2 tbsp cold water
For the filling:
- 3-4 large onions (about 500 g)
- 30 g unsalted butter
- 100 ml heavy cream (20-30%)
- 2 eggs
- 100 g hard cheese (such as Gruyère, Parmesan, or Cheddar), grated
- Salt and pepper to taste
- A pinch of nutmeg (optional)
Instructions:
-
In a large bowl, mix the flour, salt, and butter, rubbing the mixture with your fingers until it resembles fine breadcrumbs.
-
Add the egg and cold water. Knead the dough until smooth.
-
Shape the dough into a ball, wrap it in cling film, and chill in the refrigerator for 30 minutes.
-
Thinly slice the onions into half-rings.
-
Melt the butter over medium heat and sauté the onions until soft and caramelized (about 20 minutes). Stir frequently to avoid burning.
-
In a bowl, whisk together the eggs and cream. Add grated cheese, salt, pepper, and nutmeg. Mix well.
-
Roll out the chilled dough and line a tart pan (about 23 cm in diameter), forming the edges. Prick the base with a fork.
-
Spread the caramelized onions over the crust and pour the cheese and cream mixture on top.
-
Bake at 180°C (350°F) for 25-30 minutes, until the filling is golden and set.
-
Let the tart cool slightly before slicing. It tastes great both warm and cold.
17. Pumpkin Feta Phyllo Cups

Pumpkin Feta Phyllo Cups are the perfect fall-inspired appetizer to wow your guests. The crispy, buttery phyllo cups hold a creamy, savory filling of roasted pumpkin and tangy feta, creating a beautiful balance of flavors. These little bites are both elegant and comforting, making them ideal for any party or get-together.
You can read more about this recipe here.
Servings: 6
Ingredients:
- 6 sheets of phyllo dough
- 200 g pumpkin, peeled and cut into small cubes
- 100 g feta cheese, crumbled
- 1 cup baby spinach, finely chopped
- 2 tbsp olive oil
- Salt and pepper to taste
- 1 tbsp honey (optional)
- 2-3 tbsp melted butter (for brushing the phyllo dough)
- Pumpkin seeds or sesame seeds for garnish (optional)
Instructions:
- Preheat the oven to 180°C (350°F).
- Heat 1 tbsp of olive oil in a skillet and sauté the pumpkin cubes until tender, about 5-7 minutes. Season with salt, pepper, and honey (if using), and stir.
- Add the baby spinach and cook for another 1-2 minutes, until wilted. Turn off the heat and stir in the crumbled feta cheese to combine gently.
- Cut the phyllo dough sheets into squares (about 10×10 cm each) and brush each square with melted butter.
- Stack three squares on top of each other, rotating them slightly to create a star shape. Press the stacked squares into a muffin tin, shaping them into cups.
- Spoon the pumpkin, spinach, and feta filling into each phyllo cup.
- For added texture, sprinkle pumpkin seeds or sesame seeds on top, if desired.
18. Patatas Bravas

Patatas Bravas are a bold and flavorful Spanish dish that will take your party spread to the next level. Crispy, golden potatoes are drizzled with a tangy, spicy tomato sauce and a dollop of creamy aioli, making each bite perfectly balanced between heat and flavor. It’s a dish that’s sure to have everyone reaching for more, whether as a snack or side dish. Patatas Bravas are a fun, shareable treat that will add a little extra excitement to your party!
Servings: 4
Ingredients:
For the Potatoes:
- 4 medium potatoes (such as Russet or Yukon Gold), peeled and cut into 1-inch cubes
- Vegetable oil for frying
- Salt to taste
For the Brava Sauce:
- 2 tablespoons olive oil
- 1 small onion, finely chopped
- 2 cloves garlic, minced
- 1 teaspoon smoked paprika (sweet or hot)
- 1/4 teaspoon cayenne pepper (optional, for heat)
- 1 teaspoon all-purpose flour
- 2 tablespoons tomato paste
- 1/2 cup chicken or vegetable broth
- 1/2 teaspoon red wine vinegar
- Salt and black pepper to taste
For Garlic Aioli (Optional):
- 1/2 cup mayonnaise
- 1 small garlic clove, finely grated
- 1 teaspoon lemon juice
- Salt to taste
For Garnish:
- Fresh parsley, chopped
For the sauce:
- 1 tbsp olive oil
- 1 garlic clove, minced
- 1 tsp smoked paprika
- ½ tsp cayenne pepper
- 1 cup canned crushed tomatoes
- Salt and pepper to taste
Instructions:
-
Rinse the peeled and cubed potatoes in cold water to remove excess starch, then pat them completely dry with a clean kitchen towel.
-
Heat vegetable oil in a deep-frying pan or pot to 350°F (175°C).
-
Carefully fry the potatoes in batches for 6–8 minutes, or until golden and crispy. Use a slotted spoon to transfer them to a paper towel-lined plate. Sprinkle with salt while still warm.
-
Heat 2 tablespoons of olive oil in a small saucepan over medium heat.
-
Add the finely chopped onion and sauté for about 5 minutes until soft and translucent.
-
Stir in the minced garlic, smoked paprika, and cayenne pepper, cooking for about 30 seconds until fragrant.
-
Sprinkle the flour over the mixture and stir well to coat everything. Cook for 1 minute to remove the raw flour taste.
-
Stir in the tomato paste, followed by the chicken or vegetable broth. Whisk to combine until smooth.
-
Simmer the sauce for 5–7 minutes, stirring occasionally, until thickened.
-
Add the red wine vinegar, and season with salt and black pepper to taste. Adjust seasoning if needed.
-
(Optional) Use an immersion blender for a smooth texture, or leave it slightly chunky for a rustic feel.
-
In a small bowl, mix together mayonnaise, grated garlic, and lemon juice for the aioli.
-
Add salt to taste and refrigerate until ready to serve.
-
Place the crispy fried potatoes on a serving plate.
-
Drizzle the brava sauce generously over the potatoes.
-
Add dollops of garlic aioli or serve it on the side for dipping.
-
Garnish with freshly chopped parsley for a vibrant finish.
19. Creamy Baked Goats Cheese Dip

Creamy Baked Goat’s Cheese Dip is one of those appetizers that instantly steals the show. The tangy goat cheese melts perfectly into a smooth, creamy dip, while garlic and herbs add a delicious depth of flavor. It’s baked to golden perfection, making it warm and comforting, with the ideal texture for dipping. Serve it with crusty bread or fresh veggies, and you’ll have a crowd-pleasing dip that’s guaranteed to disappear in no time!
Servings: 6-8
Ingredients:
- 8 oz soft goat cheese
- 3.5 oz (about ½ cup) cream cheese
- 1.75 oz (about ¼ cup) sour cream or Greek yogurt
- 1 garlic clove, minced
- 1 tbsp olive oil
- 1 tsp fresh rosemary or thyme (or ½ tsp dried)
- Salt and pepper to taste
- 1 tsp honey (optional, for slight sweetness)
- 2-3 tbsp nuts (e.g., walnuts or pecans), for garnish
- Croutons, crackers, or sliced baguette for serving
Instructions:
-
Preheat the oven to 350°F.
-
In a bowl, combine the goat cheese, cream cheese, and sour cream (or Greek yogurt) and mix until smooth.
-
Stir in the minced garlic, olive oil, rosemary or thyme, and season with salt and pepper to taste. If you like a hint of sweetness, add 1 teaspoon of honey.
-
Transfer the mixture to a lightly greased small baking dish.
-
Bake for 15-20 minutes, or until the top is slightly golden and creamy.
-
Remove from the oven, then sprinkle with nuts and drizzle with additional honey if desired.
-
Serve hot with croutons, crackers, or sliced baguette.
20. Mini Cuban Sandwiches

Mini Cuban Sandwiches are the perfect little bite-sized version of a classic favorite. These tasty sandwiches are packed with layers of savory ham, roast pork, Swiss cheese, pickles, and a tangy mustard sauce, all sandwiched between soft, toasted rolls. They’re perfectly sized for parties, and each one packs a punch of flavor that will have your guests coming back for more.
Servings: 4
Ingredients:
- 4 pieces Cuban bread or baguette slices
- 7 oz cooked pork or beef, thinly sliced
- 3 oz ham, thinly sliced
- 3 oz Edam or Gruyère cheese (or another melting cheese), sliced
- 4-6 pickle slices, thinly sliced
- 2 tbsp mustard (yellow or Dijon)
- 2 tbsp mayonnaise
- 1 tbsp olive oil
- Salt and pepper to taste
Instructions:
-
Spread mayonnaise on one side of each bread slice and mustard on the other side.
-
On one half of the bread, layer the cooked pork, then ham, cheese, and pickles.
-
Close the sandwich by folding the bread in half, ensuring the mayo and mustard sides are on the outside. Brush the outer sides of the bread with olive oil to prevent burning on the grill.
-
Preheat the grill to medium heat.
-
Place the sandwich on the grill and close the lid.
-
Grill the sandwich for 3-4 minutes on each side, until the bread is golden brown and crispy, and the cheese inside melts.
-
If necessary, press the sandwich with a grill press or a heavy object to ensure it cooks evenly and the cheese melts faster.
-
Serve the Cuban sandwiches hot, sliced across for a better presentation.
21. Mini Caprese Pizzas
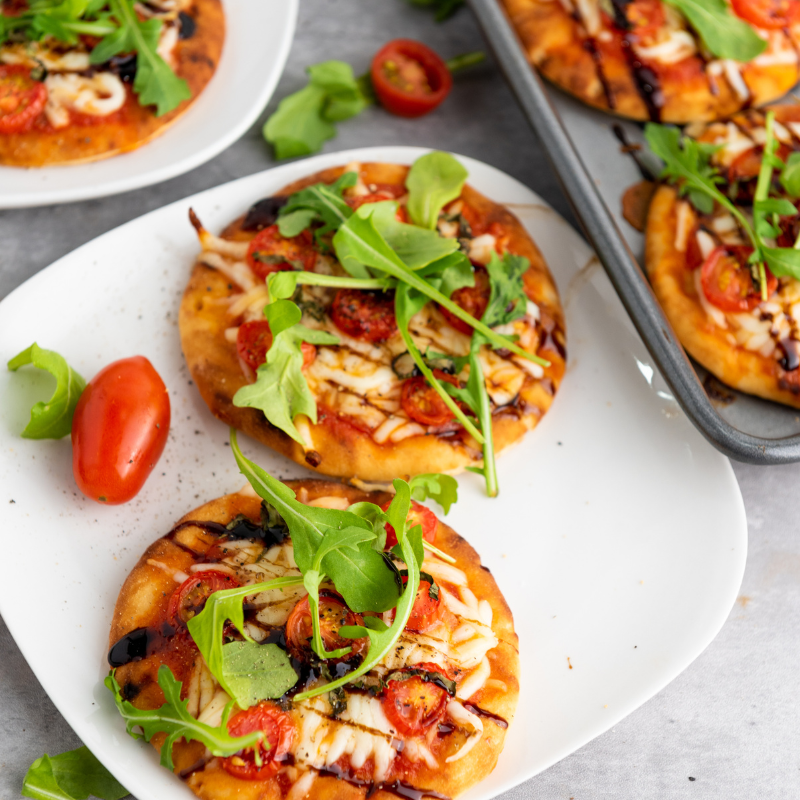
Mini Caprese Pizzas are a fresh and flavorful twist on a classic favorite. With a crispy, golden crust topped with juicy tomatoes, creamy mozzarella, and a drizzle of balsamic glaze, these little pizzas are bursting with vibrant Italian flavors. They’re the perfect finger food for a party, offering a light yet satisfying bite that’s both delicious and easy to eat. These mini Caprese pizzas will add a refreshing touch to your spread that everyone will love!
You can read more about this recipe here.
Servings: 6
Ingredients:
- 6 mini naan rounds
- ½ cup pizza sauce or marinara
- ½ cup shredded mozzarella
- ¼ cup cherry tomatoes
- ¼ cup arugula
- 3-4 basil leaves
- 1 tbsp balsamic glaze
- ½ tsp black pepper
Instructions:
- Preheat your oven to 350°F (175°C).
- Slice the cherry tomatoes.
- Stack the basil leaves on top of each other, roll them up, and slice them thinly.
- Place the mini naan rounds on a baking sheet and spread the pizza sauce evenly over each round.
- Evenly distribute the shredded cheese, cherry tomatoes, and sliced basil on top of the mini pizzas.
- Season with black pepper.
- Bake in the preheated oven for 15-20 minutes, or until the cheese is fully melted and the edges of the crust are golden and crispy.
- Top with balsamic glaze and arugula.
- Enjoy!
With these 21 hot food ideas, your party menu is set to be a huge hit! From crispy, savory bites to creamy, comforting dishes, there’s something for everyone to enjoy. Whether you’re hosting a casual get-together or a more festive celebration, these recipes will keep your guests satisfied and coming back for more!


